Microsoft Project
Learn planning, tracking, and managing projects of various sizes and complexities with Microsoft Project. Become a highly efficient Project Manager.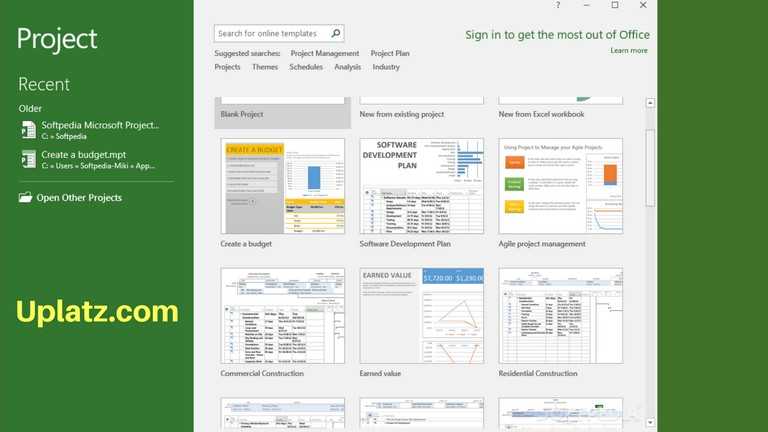 View Course Curriculum
Price Match Guarantee
Full Lifetime Access
Access on any Device
Technical Support
Secure Checkout
Course Completion Certificate
 88% Started a new career
BUY THIS COURSE (
88% Started a new career
BUY THIS COURSE (GBP 12 GBP 29 )-
 75% Got a pay increase and promotion
Students also bought -
-

- Project Management Fundamentals
- 2 Hours
- GBP 12
- 387 Learners
-
- Microsoft Excel
- 7 Hours
- GBP 12
- 1071 Learners
-

- Microsoft Azure Fundamentals
- 40 Hours
- GBP 12
- 3673 Learners
Microsoft Project is a project management program used across many businesses. Users can create project plans, record tasks, resources and costs, and produce professional and efficient reports.
As a Microsoft product, it has the look and feel of the more common programs in the suite of Microsoft Office, such as Excel and Word, so it is a popular choice for many businesses. For e.g., many of the views available are similar to an Excel spreadsheet, utilising columns and rows, and are easily customised. Microsoft Project is the de facto standard project management tool, providing everything you need to develop plans, assign resources to tasks, track progress, manage budgets and analyse workloads. It is a software program specifically designed to assist project managers in reaching project goals and objectives, as well as plan elements such as resource allocation, job distribution and input integration.
Microsoft Project offers a range of features, including:
1) Task management: Allows you to create and assign tasks, set deadlines, and track progress.
2) Resource management: Helps you manage resources such as personnel, equipment, and materials, and allocate them efficiently to complete the project.
3) Gantt charts: A visual representation of the project schedule that displays tasks, timelines, and dependencies.
4) Collaboration: Microsoft Project offers features for team collaboration, including communication tools, document sharing, and feedback mechanisms.
5) Reporting: Provides customizable reports on project progress, resource utilization, and other metrics.
6) Budget management: Allows you to set and track project budgets and expenses.
Microsoft Project is available as a desktop application for Windows, as well as a web-based version called Project Online. It can integrate with other Microsoft Office products, such as Excel and SharePoint, to provide a comprehensive project management solution. Microsoft Project is widely used in a variety of industries, including construction, engineering, manufacturing, and software development, among others. It is suitable for managing projects of all sizes, from small individual projects to large-scale enterprise projects.
Microsoft Project has evolved over the years, with the latest version being Microsoft Project 2019. Some of the new features in this version include improved task scheduling, enhanced resource management, and new reporting capabilities.
This Microsoft Project course by Uplatz offers an in-depth explanation of this extensively used project management package. This Microsoft Project training course will teach you how to make the most of planning and managing projects using Microsoft Project, building on your existing skills and teaching you to make the most of this powerful project management software.
MS Project course can help you ensure that your time is being used, and your projects are running, as efficiently as possible.
Course/Topic 1 - Getting Started with Microsoft Project - all lectures
-
This tutorial has been designed keeping in mind the needs of beginner level MS Project user. Project managers and Project planners from varied backgrounds who have not used MS Project, especially the 2013 edition before can use this tutorial for scheduling, planning, and reporting their projects of any size.
Course/Topic 2 - Backstage - all lectures
-
In this session, we will discuss the Backstage View in Word 2010. The Backstage view was introduced in Word 2010. This acts as the central place for managing your documents. The backstage view helps in creating new documents, saving and opening documents, printing and sharing documents, and so on.
Course/Topic 3 - Modifying Project Information - all lectures
-
In this session, you will get to know Microsoft Project MVP shows you how to change or edit the project start date in Microsoft Project.
Course/Topic 4 - Views and Tables - all lectures
-
In this Microsoft Project session, learn how to create Microsoft Project tables and custom views
Course/Topic 5 - Preparation - all lectures
-
This video is a guide for creating a schedule and cost estimate in Microsoft Project. It includes the functions that our used most frequently based on experience.
Course/Topic 6 - Tasks - all lectures
-
In Project, an indented task becomes a subtask of the task above it, which becomes a summary task. A summary task is made up of subtasks, and it shows their combined information.
-
This video explains a quick tip for including task notes in Microsoft Project schedule.
Course/Topic 7 - Resources - all lectures
-
In project management terminology, resources are required to carry out the project tasks. They can be people, equipment, facilities, funding, or anything (except labour) required for the completion of a project task.
-
In Microsoft Project training video learn how to enter in Resource Costs in the Resource sheet view including how to enter costs for: Work, Material and Costs resources.
-
In this session, you will learn about how to work in calendar work resource.
• Learn to create and manage simple projects.
• Learn to enter and manage tasks.
• Learn to work with a project calendar.
• Learn to add and manage project resources and work with the resource sheet.
• Learn to create basic reports for your project.
• Start by learning the basics of Project by setting up tasks
• Discover how to work with costs, deadlines, and overcome scheduling issues
• Learn about resource allocation and leveling in Microsoft Project
• Learn how to measure a project against a baseline project
• Learn to use safeguards and restrictions in Project
• Master interim plans and baselines in MS Project
• Learn how to save your project as a template for future projects
Learning outcomes:
Understand how to start Microsoft Project, creating a Project file and navigating through its many commands.
Topics covered:
· Starting Microsoft Project
· Identify Project Components
· Open, Create and Save a Project
· Getting Help in Project
· Setting Project Options
· Setting Non-Working Time
Module 2: Creating a Project Plan
Learning outcomes:
Understand how to add project tasks, set task dependencies and constraints. Topics covered:
· Setting Manual/Auto Scheduling Modes
· Entering Tasks and Duration
· Adding Task Dependencies
· Adding Constraints and Deadlines
· Adding Recurring Tasks
Module 3: Adding and Assigning Resources
Learning outcomes:
Effectively adding a pool of resources and assigning the resources to tasks within a project. Topics covered:
· Create a Pool of Resources
· Adjust Resource Calendars and Costs
· Assign Resources to Tasks
Module 4: Formatting and Printing the Plan
Learning outcomes:
Exploring different settings and options to help present and print your Project to professional standards.
Topics covered:
· Formatting Text & Text Styles
· Formatting the Gantt Chart
· Printing the Gantt Chart
· Running Project Reports
Module 5: Tracking Progress
Learning outcomes:
How to track a project's plan effectively by using tools to monitor the progress of tasks. Topics covered:
· Saving the Baseline
· Updating Tasks
· Displaying Progress Lines and Tracking Filters
Module 6: Appendix & Notes
Topics covered:
· Terms and Definitions
· Goals of Project Management
· Process of Project Management
. The Role of the Project Manager
· Planning Methods
Benefits of learning Microsoft Project
· World’s most popular project management software – globally utilized
· Developed by Microsoft – a world-class leader in software
· Can be used within any organisation, for any Project Management
· Use Earned Value Analysis and other advanced features
· Amalgamate Microsoft Project skills with other Office programs
The Microsoft Project Beginner training offers you an opportunity of working with project management application. The learners can master the project plans using Microsoft Project.
The Microsoft Project Beginner course is designed for clearing the Microsoft Certified Project Professional exam conducted by Microsoft.
The Microsoft Project Beginner course tutorial focus is to build a strong understanding in the basic concepts of Project Management Tool. The Microsoft Project Beginner course content explains the beginner concepts such as project management tool introduction, project planning, managing project schedule and budgets, present project data and build reports.
The Microsoft Project certification exam demonstrates whether the participants can prove their competency in project initialization, create task-based schedule, manage resource and assignments and communicate project information. The Microsoft Project exam is designed for those who make use of project standard, project professional for office 365 desktop mode.
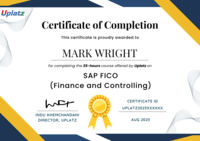
Uplatz online training guarantees the participants to successfully go through the Microsoft Project certification provided by Microsoft. Course Completion Certificate will be awarded upon the completion of the Microsoft Project course training.
Below given are the Certification details of Microsoft Project Professional:
· Certification Level: Professional
· Exam Name: Microsoft Certified Professional – Microsoft Project
· Exam Code: 74-343
· Exam Mode: Online
· Time Duration: 120 minutes
· Total Number of Questions: 45-55
· Exam Price: $165
The MS Project Professional draws an average salary of $92,913 per year depending on the knowledge and hands-on experience. The MS Project Professional job roles are in high demand and make a Promising career.
The MS Project beginner Professionals are known for managing a project in an organization. The demand of MS Project software in companies help the participants to find a job opportunity easily. The leading companies hire MS Project Professional for their strong knowledge in project management used in development. The Microsoft Project certification adds value and benefit in professional growth.
The Microsoft Project certification is targeted to those participants who are from analysis background and want to become as a project professional.
The following are the job titles:
· Project Manager
· Program/Delivery Manager
· Project Management Associate
· MS Project Specialist
· Project Administrator
· Project Analyst
The MS Project Beginner course program intention is to help you understand the scope of a project in an organization and manage it in the most systematic and agile manner meeting the project milestones and timelines.
Q.1. What is the use of link task on the Microsoft Project?
This is the process through which a project manager links two different tasks in one project.
Q.2. What is the use of the Summary task in Microsoft Project?
This is the process of estimation of the time period of a task and the length of the project. The task can be organized in order accordingly.
Q.3. Where is the summary task located in the software?
The Summary task can be found under the Insert option of the Main menu in the software.
Q.4. What are the types of tasks available in the software?
There are four types of tasks in the software, namely Summary tasks, Subtasks, Recurring tasks, and Milestones.
Q.5. Explain what kind of task is a Milestone.
Milestone is one of the most important tasks in the project which get adjusted to a time scale of zero duration. It is like a short term goal of the project.
Q.6. Explain the utility of the New Project Templates feature.
The Project Template is a feature available in the latest 2013 version of the software. It is compliant with the specific requirements of sections like business, marketing, software development, construction and more.
Q.7. What is a task path in the software?
The task path is a feature that is made specifically for the managers responsible for handling complicated and large schedules. It allows the user to set a specific path for a specified task. There are four sections to this namely, driving, driven, predecessors and successors.
Q.8. Mention three new features included in the latest version of the software.
The three new features in the latest version of the software are as follows.
* It offers easy amalgamation between the data from the software and the Microsoft office 365.
* It offers innovative reporting tools and easy accounting for varied organizations.
* The software gives you a better opportunity at the presentation where you can see the project more clearly, and scheduling can be done accordingly.
Q.9. What is known as the constraint in the software? Mention the types of constraints seen in the software.
A constraint is the tool used for scheduling of a task and then set up a due date for the task. There are eight available constraints in the software namely, as soon as possible, as late as possible, must finish on, must start on, start no later than, finish no later than, finish no earlier than and start no earlier than.
Q.10. Explain the process of setting a deadline for the MS Project.
There is a four stage process of setting a deadline in the software.
* Open the information dialogue box by double clicking on a task.
* Click on that advanced tab there.
* On the deadline field, click on the arrow which shows the calendar and choose a date from there.
* Now save the entire thing by clicking on the save button.
Q.11. What are the methods to move tasks in the 2013 version?
In the latest version of the software, you can move tasks by using any one of the two techniques.
* The cut and paste method.
* The drag and drop method.
Q.12. What is the process of removal of the resource from the project?
The steps to remove the resource from the project are as follows.
* Filter task list to see only the resource allocated ones. Then move on to the edit part of each task to replace the resource.
* Choose the task-oriented view and let the list show only milestones and tasks.
* Choose the dropdown list from the data section of the tab.
* Select the option of using resource from the list.
* A drop down list will come with the name of show tasks using. Here you can select and delete the resources according to your need.
* Under the assignment part of the tab, select the option to replace the resource. From the table that you get select the tasks that you want to replace and what you want to replace it with.
* Move on to the format tab and click the checkbox for showing summary tasks.
* Then you will get the resource sheet in the resource view section and move on to deleting the resources that you want.
Q.13. What is the utility of work contouring in the software? Name the different types of contouring that are used in the MS Project.
A Project manager needs to know the spreading of the work hours during the week. This is facilitated by the work contouring feature of the software. It shows you a graph according to the distribution of the work in the week.
* A flat contour shows evenness in the distribution of work in the week.
* The peak of activity at the end of the project is shown by the back loaded option.
* The peak of activity at the beginning of the project is shown with the front loading option.
* There are only two major peaks in the project known as double peaks- once in the beginning and one at the end.
* When the activity rises at a peak at the earliest in the project, it is known as the early peak.
* When the same thing as back loading comes with a ramp, it is known as the late peak.
* The singular peak in the middle of the project is known as bell.
* When there is both ramps down and up in a bell, it is known as a turtle.
Q.14 What do know about the benefit of leveling of resources in the software?
This one is being held as the best tool introduced in the software in its latest version. This one has made the job a lot easier for those are engaged in multitasking. This tool prevents any kind of over allocation of job to the employees. This can be better explained by using an example. If there are two projects namely X (allotted time of 3 days) and Y (allotted time of 5 days). By using this tool, the project X's work will be scheduled for the first two days and then the next two days will be for the work of the project Y. then on the last day, you will come back to the project X. This eases out the job and makes completing it relatively easier than before.
Q.15. How will you assign numerical code to the tasks?
A numerical code can be assigned after a work breakdown has been created. Go to the options under the tag of tools in the taskbar. Here you will find the outline option, and under this, you need to click on the option named showing of the outline number. The task list will come with a numerical code before it.
Q.16. How will create work breakdown in outlining structure?
An outline can be created by giving a project name. Select all the necessary items under the heading and then press the indent option. The things will line up, and the items will be seen in bold format.
Q.17. What are things to look out for before excel file importing in the software?
The following are the things that you should keep an eye out for when you importing an excel file.
* Select the excel fields from the file that you want to be mapped in the software.
* Every field is not needed to be imported into the Project, and you get to leave out the field that you do not need.
* Make sure that you include the column header while importing.
* The fields that stay blank in the excel file will remain blank in the project as well.
* The start and the finish that you have put in the excel file will be imported into the project as the start and finish constraints of the task.
* One has to make sure that he checks the file format that he has used in the excel file as that is what dictates the map selection choice viewing.
Q.18. How are the budget resource values shown in the software?
Viewing on the budget resource value is really easy when one uses the project. The first step is going to the resource usage option under the view menu. You can add the different heads here if they are not already present in the table. These heads can range from budget, work and budget costing. In the right side of the column name, you will find an arrow that allows group of the resources as needed. The next step is the selection is the selection of the drop down list of resources to group the rows. Here you can select the options that contain the categories for budget and then apply. In the summary group of rows, you can compare budget cost and work values at the same time. You can dismantle this group as and when you want by going on the arrow that is on the right side of the name of the resources name heading.
Q.19. What is the use of setting up time exception in the latest version of the project?
The time exception setting in the latest version of the project is used to change the available work hours for certain day of work.
Q.20. What is the process of setting up time exception in the latest version of the project?
One just needs to select the project and change the work times. The next step is changing the date which can be done by choosing the day from the calendar. The exception enables you to show these changes. It gives a name cell with a blank row where you can type the exceptions that you need. You will get a detailed dialogue box for the exception where you can enter all the details of the exception that you want. After you have made the changes just click ok and the job is done.
Q.21. What made you select the certification for the project?
The project comes with some huge advantages for the ones seeking jobs in the fields of project handling. It enables a person to handle multiple projects with ease and get the job done in time. It makes a person better equipped to coordinate the work of all the workers under him. The integration and management of tasks become easy which makes the project manager a major troubleshooter for the company. He ensures that the tasks are completed systematically and efficiently.
Q.22. Mention the top features of the Gantt Basics Chart
The top six features of Gantt are as follows:
* The display pattern shows a single task in a row.
* The dates are depicted in an increasing pattern according to the time taken for the project.
* The horizontal bar displays the time of the beginning and the time of ending each of the tasks in the project.
* It gives three options for running the tasks namely, overlap, sequential and parallel.
* It gives a chart with a bar diagram that shows the proportion of the work that has been done until the time that has been taken.


