


( 451 Students )


Career Path - Engineering Lead
Become an Engineering Lead with mastery over software, programming, cloud, data, & ML concepts. Lead top engineering & technology projects & products.Preview Career Path - Engineering Lead course
Price Match Guarantee Full Lifetime Access Access on any Device Technical Support Secure Checkout Course Completion Certificate 90% Started a new career
BUY THIS COURSE (
90% Started a new career
BUY THIS COURSE (GBP 32 GBP 99 )-
 92% Got a pay increase and promotion
Students also bought -
-

- Premium Career Track - Chief Information Officer (CIO)
- 400 Hours
- GBP 41
- 1870 Learners
-
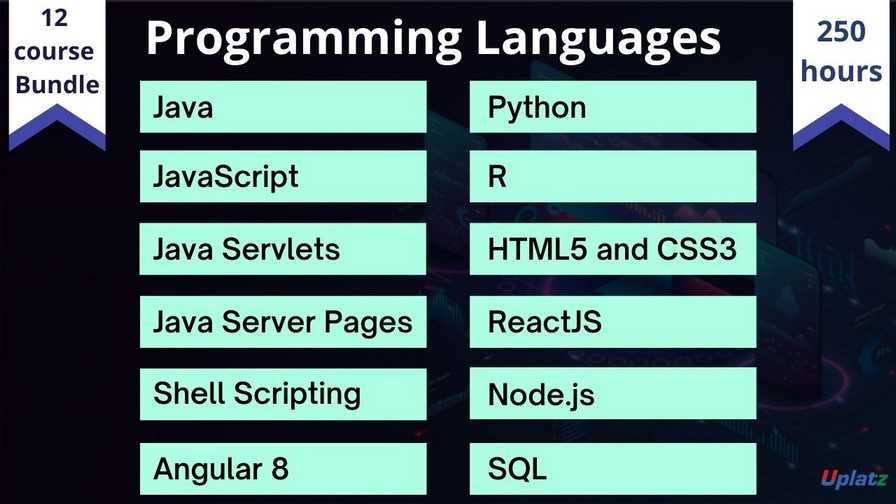
- Bundle Course - Programming Languages
- 250 Hours
- GBP 15
- 2454 Learners
-
- Career Path - Data Science Manager
- 400 Hours
- GBP 32
- 966 Learners
Courses included in the Engineering Lead Career Path Program by Uplatz:
1).Project Management Fundamentals
2).Python Programming
3).R Programming
4).Java Programming
5).JavaServer Pages (JSP)
6).Java Servlets
7).JavaScript Programming
8).Angular 8
9).Node.js
10).React
11).C and Embedded C Programming
12).C++ Programming
13).SQL Programming and MySQL
14).Introduction to DevOps
15).Git and GitHub
16).Software Performance Engineering and Multicore Programming
17).Performance Testing with LoadRunner
18).Leadership and Management
An Engineering Lead plays a crucial role in the development and delivery of software products. Their responsibilities go beyond coding and involve various aspects of project management, technical leadership, and team coordination.
Engineering leads in software development require a unique blend of technical expertise, leadership abilities, and interpersonal skills to effectively manage teams and deliver high-quality software products. Here's a comprehensive list of skills required by an engineering lead (software):
1).Technical Proficiency: Engineering leads must possess a strong foundation in software development, including proficiency in programming languages, understanding of software architecture, design patterns, and best practices.
2).Software Development Lifecycle (SDLC): Familiarity with various stages of the SDLC, including requirements gathering, design, development, testing, deployment, and maintenance, is crucial for managing engineering projects effectively.
3).Team Leadership and Management: Strong leadership skills are essential for motivating, guiding, and mentoring engineering teams. This includes setting clear goals, providing constructive feedback, resolving conflicts, and fostering a collaborative and inclusive team culture.
4).Project Management: Proficiency in project management methodologies such as Agile, Scrum, Kanban, or Waterfall, as well as tools like JIRA, Trello, or Asana, is necessary for planning, organizing, and tracking engineering projects.
5).Communication Skills: Effective communication is critical for engineering leads to convey technical concepts, project status updates, and expectations to team members, stakeholders, and other departments. They should be able to communicate clearly and diplomatically, both orally and in writing.
6).Strategic Planning and Decision-Making: Engineering leads should have strong analytical and strategic thinking skills to prioritize tasks, allocate resources effectively, and make informed decisions that align with the organization's goals and objectives.
7).Problem-Solving Abilities: Engineering leads must possess excellent problem-solving skills to analyze complex issues, identify root causes, and propose viable solutions. They should be able to troubleshoot technical challenges and guide team members in resolving them.
8).Customer Focus: Engineering leads should prioritize the needs and requirements of end-users and stakeholders when making technical decisions and designing software solutions. They should strive to deliver products that meet or exceed customer expectations.
9).Quality Assurance and Testing: Understanding of software testing principles, methodologies, and tools is important for ensuring the quality and reliability of software products. Engineering leads should emphasize the importance of testing and quality assurance throughout the development process.
10).Risk Management: Identifying potential risks and implementing mitigation strategies is essential for minimizing project delays and ensuring the successful delivery of software projects. Engineering leads should proactively assess risks and take necessary actions to mitigate them.
In summary, an Engineering Lead is responsible for both technical leadership and project management, ensuring the successful development and delivery of software projects while fostering a productive and collaborative team environment. Their role is critical in bridging the gap between technical and non-technical stakeholders and driving the software development process to meet business objectives.
Course/Topic 1 - Project Management Fundamentals - all lectures
-
In this first video tutorial on Project Management, you will learn an Introduction to Project Management, its history, benefits, an illustration to Gantt Chart, a view on some of the International standards of practicing Project Management, an overview of what exactly is a project, its relationship with General Project Management practices, Triple Constraints Theory and the role of a Project Manager and its characteristics in Project Management.
-
In this second session of Project Management, you will understand what is Process Oriented Project Management, Project Processes and its categories, what is Project Management and Product Oriented processes and an overview of different process groups and its knowledge areas.
-
In this lecture, you will learn what is a process in Project Management and its different stages in a Project Life cycle, how a process is linked to different process groups. Also, you will learn about the different Knowledge Areas related to a Process in Project Management.
-
In this video, you will learn about the Project Planning Process and Group Processes and the different processes involved in managing the Scope and Scheduled Constraints.
-
In this last session on Project Management Fundamentals, you will learn about the different constraints involved like Cost, Quality, Resources, Risks, etc. in a Process Group and how it helps in managing the entire project in Project Management.
Course/Topic 2 - Python Programming (basic to advanced) - all lectures
-
This video comprehends the terms Python which is to develop by Guido van Rossum. Guido van Rossum started implementing Python in 1989. Python is a very simple programming language so even if you are new to programming, you can learn python without facing any issues.
-
This topic will cover, Installing Python which is generally easy, and nowadays many Linux and UNIX distributions include a recent Python. Even some Windows computers now come with Python already installed.
-
In this Python tutorial, we will learn about Python variables and data types which is being used in Python. We will also learn about converting one data type to another in Python and local and global variables in Python. So, let’s begin with Python variables and data types Tutorial.
-
In this topic you will learn about the data type which is an important concept. Variables can store data of different types, and different types can do different things.
-
This session will teach you about the Python defines type conversion functions to directly convert one data type to another which is useful in day to day and competitive programming. This article is aimed at providing information about certain conversion functions.
-
In this tutorial, you will learn about the keywords which is the reserved words in Python and identifiers names given to variables, functions, etc. We cannot use a keyword as a variable name, function name or any other identifier. They are used to define the syntax and structure of the Python language.
-
In this tutorial, we are going to learn how to take multiple inputs from the user in Python. The data entered by the user will be in the string format. So, we can use the split method to divide the user entered data.
-
This tutorial focuses on two built in functions print and input to perform Input and Output task in Python. Also, you will learn to import modules and use them in your program. Some of the functions like input and print are widely used for standard input and output operations respectively. Let us see the output section first.
-
This tutorial covers the different types of operators in Python, operator overloading, precedence and associativity. Just like in mathematics, programming languages like Python have operators. You can think of them as extremely simple functions that lie at the basis of computer science.
-
In this tutorial, you'll learn everything about different types of operators in Python, their syntax and how to use them with examples. Operators are special symbols in Python that carry out arithmetic or the logical computation. The value that the operator operates on is called the operand.
-
Previously, in our tutorial on Python Operators., Today, in this Python Bitwise Operators Tutorial, we will discuss Python Bitwise AND, OR, XOR, Left-shift, Right-shift, and 1’s complement Bitwise Operators in Python Programming. Along with this, we will discuss syntax and example of Python Bitwise Operators.
-
Today, we talk about Python decision making constructs. This includes Python if statements, if else statements, elif statement, nested if conditions and single statement conditions. We will understand these with syntax and example to get a clear understanding. So, let’s start the Python Decision Making Tutorial.
-
In this session you will learn about the if elif else which are conditional statements that provide you with the decision making that is required when you want to execute code based on a particular condition. The if elif else statement used in Python helps automate that decision making process.
-
In this session, you'll learn the different variations of for loop, for loop is used for iterating over a sequence that is either a list, a tuple, a dictionary, a set, or a string. This is less like the for keyword in other programming languages, and works more like an iterator method as found in other object-orientated programming languages.
-
In this session, you will learn to create a while loop in Python. Loops are used in programming to repeat a specific block of code. In this article, you will learn to create a while loop in Python. Loops are used in programming to repeat a specific block of code.
-
In this session, we show how to create an infinite loop in Python. An infinite loop that never ends it never breaks out of the loop. So, whatever is in the loop gets executed forever, unless the program is terminated. For certain situations, an infinite loop may be necessary.
-
In this video, you will learn how to make the computer execute a group of statements over and over if certain criterion holds. The group of statements being executed repeatedly is called a loop.
-
In this session, you'll learn about the different numbers used in Python, how to convert from one data type to the other, and the mathematical operations supported in Python. Python supports integers, floats and complex numbers.
-
In the tutorial on strings in Python, you learned how to define strings objects that contain sequences of character data. Processing character data is integral to programming. It is a rare application that doesn’t need to manipulate strings at least to some extent.
-
As discussed in the above tutorial, strings in Python are immutable and thus updating or deleting an individual character in a string is not allowed, which means that changing a particular character in a string is not supported in Python. Although, the whole string can be updated and deleted.
-
In this session, we'll learn everything about Python lists, how they are created, slicing of a list, adding or removing elements from them and so on. The list is a most versatile datatype available in Python which can be written as a list of comma-separated values items between square brackets. Important thing about a list is that items in a list need not be of the same type.
-
In this tutorial, learn how to update list element using Python. Use the index position and assign the new element to change any element of List. You can change the element of the list or item of the list with the methods given here.
-
In that tutorial of Python Functions, we discussed user-defined functions in Python. But that isn’t all, a list of Python built-in functions that we can toy around with. In this tutorial on Built-in functions in Python, we will see each of those, we have 67 of those in Python 3.6 with their Python Syntax and examples.
-
In this tutorial, you'll learn everything about Python tuples. More specifically, what are tuples, how to create them, when to use them and various methods you should be familiar with. A tuple in Python is similar to a list. The difference between the two is that we cannot change the elements of a tuple once it is assigned whereas we can change the elements of a list.
-
This session teaches you the tuple in Python which are immutable sequences, you cannot update them. You cannot add, change, remove items (elements) in tuples.Tuple represent data that you don't need to update, so you should use list rather than tuple if you need to update it. However, if you really need to update tuple, you can convert it to list, update it, and then turn it back into tuple.
-
In this tutorial, you'll learn everything about Python dictionaries how they are created, accessing, adding, removing elements from them and various built in methods. Python dictionary is an unordered collection of items. Each item of a dictionary has a pair. Dictionaries are optimized to retrieve values when the key is known.
-
In this session we will teach you the dictionary which is a data type similar to arrays, but works with keys and values instead of indexes. Each value stored in a dictionary can be accessed using a key, which is any type of object a string, a number, a list, etc. instead of using its index to address it.
-
In this session we will teach you the Python for beginners training course which is a lead the students from the basics of writing and running Python scripts to more advanced features such as file operations, regular expressions, working with binary data, and using the extensive functionality of Python modules. Extra emphasis is placed on features unique to Python, such as tuples, array slices, and output formatting.
-
In this video, you will learn to manipulate date and time in Python with the help of examples. Python has a module named datetime to work with dates and times. Let's create a few simple programs related to date and time before we dig deeper.
-
In this session, you'll learn about functions, what a function is, the syntax, components, and types of functions. Also, you'll learn to create a function in Python. In Python, a function is a group of related statements that performs a specific task. Functions help break our program into smaller and modular chunks.
-
In this video we will learn, the function which use the same variable and object. Pass by Value. In pass by value the function is provided with a copy of the argument object passed to it by the caller. That means the original object stays intact and all changes made are to a copy of the same and stored at different memory locations.
-
In this tutorial, you'll learn about the anonymous function, also known as lambda functions. You'll learn what they are, their syntax and how to use them with examples.
-
In this tutorial we will teach you the module which is a piece of software that has a specific functionality. Like, when building a ping pong game, one module would be responsible for the game logic, and another module would be responsible for drawing the game on the screen. Each module is a different file, which can be edited separately.
-
This session teaches you the Python rename method which is used to rename a file or directory. This method is a part of the python module and comes extremely handy.
-
In this tutorial, you'll learn about Python file operations. More specifically, opening a file, reading from it, writing into it, closing it, and various file methods that you should be aware of.
-
In this tutorial we will learn about program for files in Python which provides us with an important feature for reading data from the file and writing data into a file. Mostly, in programming languages, all the values or data are stored in some variables which are volatile in nature.
-
In this session we will tell you the method that you the current position within the file; in other words, the next read or write will occur at that many bytes from the beginning of the file. The seek method changes the current file position.
-
In this tutorial, you'll learn how to handle exceptions in your Python program using try, except and finally statements with the help of examples. Python has many built-in exceptions that are raised when your program encounters an error (something in the program goes wrong).
-
In this tutorial, you will learn about different types of errors and exceptions that are built-in to Python. They are raised whenever the Python interpreter encounters errors.
-
In this video we will teach you about the Exception handling in Python which is very similar to Java. The code, which harbors the risk of an exception, is embedded in a try block.
-
In this tutorial, you will learn about the core functionality of Python objects and classes. You'll learn what a class is, how to create it and use it in your program.
-
In this session you will learn about the programming in Python (object-oriented programming) for some time, then you have definitely come across methods that have self as their first parameter. Let us first try to understand what this recurring self-parameter is.
-
This tutorial teaches you about the regular expression which is a special sequence of characters that helps you match or find other strings or sets of strings, using a specialized syntax held in a pattern. Regular expressions are widely used in UNIX world.
-
In this tutorial we will learn about the python search which is a method of the module That is Syntax of search () re. search (pattern, string). It is similar to re. match () but it doesn’t limit us to find matches at the beginning of the string only. Unlike in re. match () method, here searching for pattern ‘Tutorials’ in the string ‘TP Tutorials Point TP’ will return a match.
-
This workshop will introduce GUI programming in Python, it is a is a popular language for elementary programming but it not so easy to write programs with a graphical user interface (GUI).
-
In this tutorial, we will learn how to develop graphical user interfaces by writing some Python GUI examples using the Tkinter package. Tkinter package is shipped with Python as a standard package, so we don’t need to install anything to use it.
-
This session teaches you about the frame widgets which is a rectangular region on the screen. The frame widget is mainly used as a geometry master for other widgets, or to provide padding between other widgets.
Course/Topic 3 - R Programming - all lectures
-
In this lecture session we learn about basic introduction of R programming for beginners and also talk about basic functions of R programming for beginners.
-
In this tutorial we learn about how we install r programming in our software and also talk about the best way of installing R programming for beginners.
-
In this lecture session we learn about R's basic data structures including the vector, list, matrix, data frame, and factors. Some of these structures require that all members be of the same data type (e.g. vectors, matrices) while others permit multiple data types (e.g. lists, data frames). Objects may have attributes, such as name, dimension, and class.
-
In this lecture session we learn about A vector is the basic data structure in R, or we can say vectors are the most basic R data objects.
-
In this lecture session we learn about R is an ideal tool when it comes to data wrangling. It allows the usage of several preprocessed packages that makes data wrangling a lot more easier. This is one of the main reasons as to why R is preferred in the Data Science community.
-
In this lecture session we learn about R packages are a collection of R functions, compiled code and sample data. They are stored under a directory called "library" in the R environment. By default, R installs a set of packages during installation. More packages are added later, when they are needed for some specific purpose.
-
In this tutorial we learn about R is an open-source programming language that is widely used as a statistical software and data analysis tool.
-
In this lecture session we learn that R can be used as a powerful calculator by entering equations directly at the prompt in the command console. Simply type your arithmetic expression and press ENTER. R will evaluate the expressions and respond with the result.
-
In this tutorial we learn about Conditional statements are those statements where a hypothesis is followed by a conclusion. It is also known as an " If-then" statement.
-
In this tutorial we learn about In coding, you ask your computer to check conditions by writing conditional statements. Conditional statements are the way computers can make decisions.
-
In this lecture session we learn about It is a type of control statement that enables one to easily construct a loop that has to run statements or a set of statements multiple times. For loop is commonly used to iterate over items of a sequence.
-
In this lecture session we learn about Repeat loop, unlike other loops, doesn't use a condition to exit the loop instead it looks for a break statement that executes if a condition within the loop body results to be true.
-
In this lecture session we learn that Sum of n natural numbers can be defined as a form of arithmetic progression where the sum of n terms are arranged in a sequence with the first term being.
-
In this lecture session we learn about The formula to find the sum of n terms in AP is Sn = n/2 (2a+(n−1)d), in which a = first term, n = number of terms, and d = common difference between consecutive terms.
-
In this tutorial we learn about A switch statement that allows a variable to be tested for equality against a list of values. Each value is called a case, and the variable being switched on is checked for each case.
-
In this lecture session we learn about Data preprocessing, a component of data preparation, describing any type of processing performed on raw data to prepare it for another data processing procedure.
-
In this tutorial we learn about Data preprocessing is essential before its actual use. Data preprocessing is the concept of changing the raw data into a clean data set. The dataset is preprocessed in order to check missing values, noisy data, and other inconsistencies before executing it to the algorithm.
-
In this lecture session we learn about Factor in R is a variable used to categorize and store the data, having a limited number of different values. It stores the data as a vector of integer values. Factor in R is also known as a categorical variable that stores both string and integer data values as levels.
-
In this tutorial we learn about A data frame is a table or a two-dimensional array-like structure in which each column contains values of one variable and each row contains one set of values from each column.
-
In this tutorial we learn about In R we use merge() function to merge two dataframes in R. This function is present inside the join() function of the dplyr package.
-
In this lecture session we learn about The R merge function allows merging two data frames by common columns or by row names. This function allows you to perform different database (SQL) joins, like left join, inner join, right join or full join, among others.
-
In this tutorial we learn about The two data frames must have the same variables, but they do not have to be in the same order.
-
In this lecture session we learn about merge is a generic function whose principal method is for data frames: the default method coerces its arguments to data frames and calls the "data. frame" method. By default the data frames are merged on the columns with names they both have, but separate specifications of the columns can be given by.
-
In this lecture session we learn about The functions which are already created or defined in the programming framework are known as a built-in function. R has a rich set of functions that can be used to perform almost every task for the user.
-
In this lecture session we learn about Melting and Casting are one of the interesting aspects in R programming to change the shape of the data and further, getting the desired shape.
Course/Topic 4 - Java Programming - all lectures
-
In this video you will learn the introduction to Java programming. This tutorial explains the installation and usage of the Java programming language. It also contains examples for standard programming tasks.
-
In this video you will learn based on the data type of a variable, the operating system allocates memory and decides what can be stored in the reserved memory. Therefore, by assigning different data types to variables, you can store integers, decimals, or characters in these variables.
-
In this video you will learn about the control statement in java is a statement that determines whether the other statements will be executed or not. It controls the flow of a program. An 'if' statement in java determines the sequence of execution between a set of two statements.
-
In this video you will learn Looping in programming languages is a feature which facilitates the execution of a set of instructions/functions repeatedly while some condition evaluates to true. while loop: A while loop is a control flow statement that allows code to be executed repeatedly based on a given Boolean condition.
-
In this video you learn about Classes and Objects are basic concepts of Object Oriented Programming which revolve around the real life entities. A class is a user defined blueprint or prototype from which objects are created. It represents the set of properties or methods that are common to all objects of one type.
-
In this you will learn In Java, static keyword is mainly used for memory management. It can be used with variables, methods, blocks and nested classes. It is a keyword which is used to share the same variable or method of a given class. Basically, static is used for a constant variable or a method that is same for every instance of a class.
-
In this video you will learn about Array an array is a group of like-typed variables that are referred to by a common name. Arrays in Java work differently than they do in C/C++. Following are some important points about Java arrays.
-
In this video you will learn the java.util.Arrays.binarySearch(Object[] a, Object key) method searches the specified array for the specified object using the binary search algorithm. The array be sorted into ascending order according to the natural ordering of its elements prior to making this call. If it is not sorted, the results are undefined.
-
In this video, you will learn about the Java multidimensional array using 2-dimensional arrays and 3-dimensional arrays with the help of examples.
-
In this video you will learn the java.util.Arrays.sort(Object[] a, int fromIndex, int toIndex) method sorts the specified range of the specified array of objects into ascending order, according to the natural ordering of its elements. The range to be sorted extends from index fromIndex, inclusive, to index toIndex, exclusive.
-
In this video you will learn Inheritance in Java is a mechanism in which one object acquires all the properties and behaviors of a parent object. It is an important part of OOPs (Object Oriented programming system).
-
In this video you will learn more about Inheritance.
-
In this video you will learn In Java, two or more methods can have same name if they differ in parameters (different number of parameters, different types of parameters, or both). These methods are called overloaded methods and this feature is called method overloading.
-
In the last video, you will learn about inheritance. Inheritance is an OOP property that allows us to derive a new class (subclass) from an existing class (superclass). The subclass inherits the attributes and methods of the superclass.
-
In this video you will learn about t he super keyword in java is a reference variable that is used to refer parent class objects. ... Basically this form of super is used to initialize superclass variables when there is no constructor present in superclass. On the other hand, it is generally used to access the specific variable of a superclass.
-
In this video you will learn about the Java programming language, the final keyword is used in several contexts to define an entity that can only be assigned once. Once a final variable has been assigned, it always contains the same value.
-
In this video you will learn about Polymorphism, it is the ability of an object to take on many forms. The most common use of polymorphism in OOP occurs when a parent class reference is used to refer to a child class object. Any Java object that can pass more than one IS-A test is considered to be polymorphic.
-
In this video you will learn about the class which is declared with the abstract keyword is known as an abstract class in Java. It can have abstract and non-abstract methods (method with the body).
-
In this video you will learn about methods form the object's interface with the outside world; the buttons on the front of your television set, for example, are the interface between you and the electrical wiring on the other side of its plastic casing. You press the "power" button to turn the television on and off.
-
In this video you will learn the interface is a reference type in Java. It is similar to class. It is a collection of abstract methods. A class implements an interface, thereby inheriting the abstract methods of the interface.
-
In this video you will learn about the interface in Java is a mechanism to achieve abstraction. There can be only abstract methods in the Java interface, not method body. It is used to achieve abstraction and multiple inheritance in Java.
-
In this video you will learn about the main difference is methods of a Java interface are implicitly abstract and cannot have implementations. A Java abstract class can have instance methods that implements a default behavior. ... A Java class can implement multiple interfaces but it can extend only one abstract class.
-
In this video you will learn about the packages in Java is used to group related classes. Think of it as a folder in a file directory. We use packages to avoid name conflicts, and to write a better maintainable code. Built-in Packages (packages from the Java API) User-defined Packages (create your own packages)
-
In this video you will learn about the access modifier, there are four types of Java access modifiers: Private: The access level of a private modifier is only within the class. Default: The access level of a default modifier is only within the package. Protected: The access level of a protected modifier is within the package and outside the package through child class.
-
In this video you will learn about the Encapsulation in Java is a mechanism of wrapping the data (variables) and code acting on the data (methods) together as a single unit. In encapsulation, the variables of a class will be hidden from other classes, and can be accessed only through the methods of their current class.
-
In this video you will learn about the Strings in Java are Objects that are backed internally by a char array. Since arrays are immutable (cannot grow), Strings are immutable as well. Whenever a change to a String is made, an entirely new String is created. Below is the basic syntax for declaring a string in Java programming language.
-
In this video you will learn about Java String, how to create it and its various methods with the help of examples. In Java, a string is a sequence of characters. For example, "hello" is a string containing a sequence of characters 'h', 'e', 'l', 'l', and 'o'.
-
In this video you will learn about the Exception (or exceptional event) is a problem that arises during the execution of a program. When an Exception occurs the normal flow of the program is disrupted and the program/Application terminates abnormally, which is not recommended, therefore, these exceptions are to be handled.
-
In this video you will learn about the Customized Exception Handling: Java exception handling is managed via five keywords: try, catch, throw, throws, and finally. Briefly, here is how they work. Program statements that you think can raise exceptions are contained within a try block. If an exception occurs within the try block, it is thrown.
-
In this video you will learn about the Finally block contains all the crucial statements that must be executed whether exception occurs or not. ... The statements present in this block will always execute regardless of whether exception occurs in try block or not such as closing a connection, stream etc.
-
In this video you will learn about the Java exception this fall into two main categories: checked exceptions and unchecked exceptions. In this article, we'll provide some code samples on how to use them.
-
In this video you will learn about the Throw is a keyword which is used to throw an exception explicitly in the program inside a function or inside a block of code. Throws is a keyword used in the method signature used to declare an exception which might get thrown by the function while executing the code
-
In this video you will learn how to create a custom exception in Java. We’ll show how user-defined exceptions are implemented and used for both checked and unchecked exceptions.
-
In this video you will learn about the Threads which allows a program to operate more efficiently by doing multiple things at the same time. Threads can be used to perform complicated tasks in the background without interrupting the main program.
-
In this video you will learn about the Thread class provides the join, method which allows one thread to wait until another thread completes its execution. If t is a Thread object whose thread is currently executing, then t. join, will make sure that t is terminated before the next instruction is executed by the program.
-
In this video you will learn about the Synchronization in java is the capability to control the access of multiple threads to any shared resource. Java Synchronization is better option where we want to allow only one thread to access the shared resource.
-
In this video you will learn about the Inter Thread Communication, if you are aware of inter-process communication then it will be easy for you to understand interthread communication. Interthread communication is important when you develop an application where two or more threads exchange some information.
-
In this video you will learn about the Linked List, it is a part of the Collection framework present in java. util package. This class is an implementation of the Linked List data structure which is a linear data structure where the elements are not stored in contiguous locations and every element is a separate object with a data part and address part.
-
In this video you will learn about the Linked List, it is a part of the Collection framework present in java. util package. This class is an implementation of the LinkedList data structure which is a linear data structure where the elements are not stored in contiguous locations and every element is a separate object with a data part and address part.
-
In this video you will learn about the Java Hash Set it class is used to create a collection that uses a hash table for storage. It inherits the Abstract Set class and implements Set interface. The important points about Java HashSet class are: HashSet stores the elements by using a mechanism called hashing. HashSet contains unique elements only.
-
In this video you will learn about the Comparable and comparator, these both are an interface that can be used to sort the elements of the collection. Comparator interface belongs to java.util package while comparable belongs to java. Lang package. Comparator interface sort collection using two objects provided to it, whereas comparable interface compares" this" refers to the one objects provided to it.
-
In this video you will learn about the queue its interface is provided in java. util package and it implements the Collection interface. The queue implements FIFO i.e. First in First Out. This means that the elements entered first are the ones that are deleted first.
-
In this video you will learn about the Map its interface present in java util package represents a mapping between a key and a value. The Map interface is not a subtype of the Collection interface. Therefore, it behaves a bit differently from the rest of the collection types. A map contains unique keys.
-
In this video you will learn about the Map its implementations are grouped into general-purpose, special-purpose, and concurrent implementations.
-
In this video you will learn about JDBC it stands for Java Database Connectivity. JDBC is a Java API to connect and execute the query with the database. It is a part of JavaSE (Java Standard Edition). JDBC API uses JDBC drivers to connect with the database. There are four types of JDBC drivers.
-
In this video you will learn about the JDBC API is a Java API that can access any kind of tabular data, especially data stored in a Relational Database. JDBC works with Java on a variety of platforms, such as Windows, Mac OS, and the various versions of UNIX.
-
In this video you will learn how to create a simple JDBC application. This will show you how to open a database connection, execute a SQL query, and display the results.
-
In this video you will learn how to use a Java JDBC Prepared Statement instead of a Statement and benefit from the features of the Prepared Statement. The Java JDBC Prepared Statement primary features are: Easy to insert parameters into the SQL statement
-
In this video you will learn about Callable Statement Database in this Once a connection is obtained, we can interact with the database. The JDBC Statement, Callable Statement, and Prepared Statement interfaces define the methods and properties that enable you to send SQL or PL/SQL commands and receive data from your database
-
In this video you will learn about the dynamic database refers to the process of firing SQL queries on demand to create the schema afresh. The JDBC API library is quite capable of dealing with the situation.
-
In this video you will learn about the Lambda expressions are introduced in Java 8 and are touted to be the biggest feature of Java 8. Lambda expression facilitates functional programming, and simplifies the development a lot.
-
In this video you will learn about the Predicate it is a generic functional interface that represents a single argument function that returns a Boolean value (true or false). This interface available in java unit function package and contains a test method that evaluates the predicate of a given argument.
-
In this video you will learn about the article Lambda Expression with Collections are discussed with examples of sorting different collections like Array List, Tree Set, Tree Map, etc.
-
In this video you will learn about the Consumer it is an in-built functional interface introduced in Java 8 in the java. util. function package. Consumer can be used in all contexts where an object needs to be consumed that is taken as input, and some operation is to be performed on the object without returning any result.
-
In this video you will learn about the Stream, it is a new abstract layer introduced in Java 8. Using stream, you can process data in a declarative way similar to SQL statements. For example, consider the following SQL statement.
-
In this video, you will learn the major pieces of new functionality Java 8 had added – Streams. We'll explain what streams are about and showcase the creation and basic stream operations with simple examples
Course/Topic 5 - JSP (JavaServer Pages) - all lectures
-
In this first video on JSP, you will get a brief overview of some terminologies like World Wide Web, Web Application, What is Dynamic Web Page, HTTP, HTTP Requests, Get vs. Post, Servlet Container, Limitations of CGI. and the features of Servlets.
-
In this tutorial, you will learn about Java Server Pages.
-
In this video, you will learn about the Directory Structure in JSP, a complete overview of what is directory structure, how to use it and a practical demonstration of its implementation on the Eclipse window.
-
This video is all about the in-depth concept on the lifecycle of a JSP page. Here the instructor will be seen explaining each and every details associated with the JSP lifecycle.
-
In this first part of the Scripting Elements, you will get a detailed explanation about Scripting elements used in JSP. In short, you will learn about JSP tags. Here the tutor will be seen giving an overview about 3 different tags used in JSP which are scriplet tag, expressive tag and the declaration tag.This video will primary focus on the introduction to scriplet. Finally, the instructor will be seen demonstrating a small program writing scriplet inside a java program
-
This is a continuation video to the scriplet tag and the program that was seen by the instructor writing scriplet inside a java program. Further, it will be followed with an overview on declaration tag and the syntax that is being used in this tag.
-
In this video, the instructor will be seen modifying the previous program to count the number of pages that has been accessed. Here, the instructor will be showing how to write the code for the above work process in eclipse window.
-
In this video, you will understand a very important concept of JSP which is the Implicit Object. You will get a complete theoretical overview of the Implicit Object and its type along with a practical demonstration on its implementation.
-
This is the first part of the Implicit project where the instructor will be seen demonstrating a small project on it, which will help students in clearing all their doubts regarding Implicit Objects in JSP.
-
This is the second part of the previous video where the instructor will be seen continuing with the program for demonstrating the project on Implicit Object.
-
This video is a complete demonstration program on Implicit Project focusing on Login JSP. Here the tutor will be seeing explaining the process with a complete step by step process.
-
In this course, you will learn about the Implicit Project Registration and the complete step by steps in implementing the steps. Here you will learn to design registration.jsp along with understanding the other concepts.
-
In this video, you will learn to design success, failure and user exists.jsp. Here the instructor will be seen explaining each and every details on the above three concepts.
-
Here, in this video, you will get to see the execution of the program done in the previous videos and find out the output of the project. This video consists of only the execution of the program and not the coding, which was done in the previous videos.
-
In this chapter, we will discuss Directives in JSP. These directives provide directions and instructions to the container, telling it how to handle certain aspects of the JSP processing.
-
The JSP directives are messages that tells the web container how to translate a JSP page into the corresponding servlet.
-
This include directive is used to include the contents of any resource it may be JSP, file, html file or text file. They include directive includes the original content of the included resource at page translation time (the JSP, page is translated only once so it will be better to include static resource)
-
They include directive is used to include a file during the translation phase. This directive tells the container to merge the content of other external files with the current JSP during the translation phase. You may code include directives anywhere in your JSP page.
-
The jsp:useBean action tag is used to locate or instantiate a bean class. If bean object of the Bean class is already created, it doesn't create the bean depending on the scope. But if object of bean is not created, it instantiates the bean.
-
In this video we will see how to use a bean class in JSP with the help of jsp:useBean, jsp:setProperty and jsp:getProperty action tags.
-
In this video we will see how to use a bean class in JSP with the help of jsp:useBean, jsp:setProperty and jsp:getProperty action tags.
-
The jsp: include action tag is used to include the content of another resource it may be jsp, html or servlet. The jsp include action tag includes the resource at request time so it is better for dynamic pages because there might be changes in future. The jsp: include tag can be used to include static as well as dynamic pages.
-
Include action tag is used for including another resource to the current JSP page. The included resource can be a static page in HTML, JSP page or Servlet. We can also pass parameters and their values to the resource which we are including. Below I have shared two examples of
-
JSP forward action tag is used for forwarding a request to another resource (It can be a JSP, static page such as html or Servlet). Request can be forwarded with or without parameter. In this tutorial we will see examples of
-
The forward action terminates the action of the current page and forwards the request to another resource such as a static page, another JSP page, or a Java Servlet.
-
The Expression Language (EL) simplifies the accessibility of data stored in the Java Bean component, and other objects like request, session, application etc.
-
JSP Expression Language (EL) makes it possible to easily access application data stored in JavaBeans components. JSP EL allows you to create expressions both (a) arithmetic and (b) logical. Within a JSP EL expression, you can use integers, floating point numbers, strings, the built-in constants true and false for boolean values, and null.
-
Expression Language (EL) is mechanism that simplifies the accessibility of the data stored in Java bean component and other object like request, session and application, etc. There are many operators in JSP that are used in EL like arithmetic and logical operators to perform an expression. It was introduced in JSP.
-
JSP is primarily used for view purpose. But even to display result of business logic, we need to access the data, process the data, store it in some scope in JSP. We have discussed how to do all these in JSP using scripting tags in earlier chapter.
-
A JavaBean is a specially constructed Java class written in the Java and coded according to the JavaBeans API specifications.
-
A JavaBean property is a named attribute that can be accessed by the user of the object. The attribute can be of any Java data type, including the classes that you define.
-
According to Java white paper, it is a reusable software component. A bean encapsulates many objects into one object so that we can access this object from multiple places. Moreover, it provides easy maintenance.
-
In this chapter, we will understand the different tags in JSP. The JavaServer Pages Standard Tag Library (JSTL) is a collection of useful JSP tags which encapsulates the core functionality common to many JSP applications.
-
The JSP Standard Tag Library (JSTL) represents a set of tags to simplify the JSP development.
-
The
-
The
-
The
-
-
The
-
The JSTL function provides several standard functions, most of these functions are common string manipulation functions.
-
JSTL stands for JSP standard tag Library which is a collection of very useful core tags and functions. These tags and functions will help you write JSP code efficiently.
-
Java Server Pages Tag Library (JSTL) is a set of tags that can be used for implementing some common operations such as looping, conditional formatting, and others. In this session, we'll be discussing how to setup JSTL and how to use its numerous tags.
-
MVC stands for Model View and Controller. It is a design pattern that separates the business logic, presentation logic and data. Controller acts as an interface between View and Model. Controller intercepts all the incoming requests.
-
In this last video, we'll create a small web application that implements the Model View Controller (MVC) design pattern, using basic Servlets and JSPs. We'll explore a little bit about how MVC works, and its key features before we move on to the implementation.
Course/Topic 6 - Java Servlets - all lectures
-
In this video you will learn the the World Wide Web (www, W3) is an information space where documents and other web resources are identified by URIs, interlinked by hypertext links, and can be accessed via the Internet. It has become known simply as the Web.
-
In this video you will learn about the Servlets are Java classes which service HTTP requests and implement the javax. servlet. Servlet interface. Web application developers typically write servlets that extend javax. servlet.http.HttpServlet, an abstract class that implements the Servlet interface and is specially designed to handle HTTP requests.
-
In this video you will learn about the servlet request When a browser requests for a web page, it sends lot of information to the web server which cannot be read directly because this information travel as a part of header of HTTP request.
-
In this video you will learn the Java and XML configuration are not exclusive - both can be used inside the same Spring application. In order to retrieve a bean from an XML file, one has to use the Spring container.
-
In this video you will learn the web server (e.g. Apache Tomcat) starts up, the servlet container deploy and loads all the servlets. During this step Servlet container creates ServletContext object. ... For each instantiated servlet, its init() method is invoked. 3) Client (user browser) sends an Http request to web server on a certain port.
-
In this video you will learn the case of Get request, only limited amount of data can be sent because data is sent in header. In case of post request, large amount of data can be sent because data is sent in body. ... Post request is secured because data is not exposed in URL bar.
-
In this video you will learn the Request Dispatcher interface provides the facility of dispatching the request to another resource it may be html, servlet or jsp. This interface can also be used to include the content of another resource also. It is one of the way of servlet collaboration.
-
In this video you learn the sendRedirect() method of Http Servlet Response interface can be used to redirect the response to another resource i.e. it may be a Servlet, JSP or HTML file. It works on the client side because it uses the URL bar of the browser to make another request. Hence, it can work inside and outside the server.
-
In this Video you will learn the a object of ServletConfig is created by the web container for each servlet. This object can be used to get configuration information from web.xml file.
-
In this second part, we’ll look a little more in depth at what makes Servlets tick. First off, we’ll examine how the HttpServletRequest object can be used to fetch information about the browser request responsible for invoking the Servlet, such as the contents of an HTML form that was submitted as part of the request.
-
In this video you learn the object of ServletContext is created by the web container at time of deploying the project. This object can be used to get configuration information from web.xml file. There is only one ServletContext object per web application.
-
In this video you learn to defines a set of methods that a servlet uses to communicate with its servlet container, for example, to get the MIME type of a file, dispatch requests, or write to a log file.
-
In this video you will learn how If
value is the same for two servlets than they will be loaded in an order on which they are declared inside web. xml file. 2. if is 0 or negative integer than Servlet will be loaded when Container feels to load them. -
In this video you will learn the HTTP is a "stateless" protocol which means each time a client retrieves a Web page, the client opens a separate connection to the Web server and the server automatically does not keep any record of previous client request.
-
A cookie is a small piece of information that is persisted between the multiple client requests. A cookie has a name, a single value, and optional attributes such as a comment, path and domain qualifiers, a maximum age, and a version number.
-
In this video you will learn the hidden form field is used to store session information of a client. In this method, we create a hidden form which passes the control to the servlet whose path is given in the form action area. Using this, the information of the user is stored and passed to the location where we want to send data.
-
In this video you will learn the URL rewriting, we append a token or identifier to the URL of the next Servlet or the next resource. We can send parameter name/value pairs using the following format.
-
In this video you will learn the Http Session object represents a user session. A user session contains information about the user across multiple HTTP requests.
-
In this video you will learn about the filter is an object that is invoked at the preprocessing and postprocessing of a request. It is mainly used to perform filtering tasks such as conversion, logging, compression, encryption and decryption, input validation etc.
-
In this video you will learn about the Java Servlet Filter is used to intercept the client request and do some pre-processing. It can also intercept the response and do post-processing before sending to the client in web application.
-
In this video you will learn this tutorial assumes you have understanding on how JDBC application works. Before starting with database access through a servlet, make sure you have proper JDBC environment setup along with a database.
-
In this video, you will learn how to build a Todo web application using JSP, Servlet, JDBC and MySQL database. You can download the source code of this tutorial from my Github repository, the link given at the end of this tutorial.
-
In this video you will learn to Create a separate class to create a connection of database, as it is a lame process to writing the same code snippet in all the program. Create a .java file which returns a Connection object.
-
In this video you will learn more about Database servlets.
-
In this Java tutorial, we’re going to help you understand the process of coding a basic Java web application that manages a collection of books with the basic feature: list, insert, update, delete (or CURD operations - Create, Update, Read and Delete).
-
In this video you learn more about Update Servlet Database - part 2
-
In this video you learn about Inside the doGet() method uses the getWriter() method of ServletResponse interface with the reference of HttpServletResponse interface. Then establish a connection of database in java code and then deleted a specified row as in our example uses "delete from data where name = 'bipul' ".
-
After this video Although you can start functions when your page loads, many times you'll want to start functions when a user clicks a link, enters a form, scrolls, moves his or her mouse over an object, or does something else. These actions are called events. You can set specific functions to run when the user performs an event. These functions "listen" for an event and then initiate the function.
-
This tutorial will show how to register a javax.servlet.http.HttpSessionListener and track the number of active sessions in the web application using metrics.
-
In this video, you are going to understand how to create a listener class which listens to an event when a session is created or destroyed in a web application. For this, we are going to create a webpage which asks the user to enter his name and city in a form and click the submit button.
-
In this video you will learn ServletContextListener receives the notifications about changes to the servlet context and perform some action. ServletContextListener is used to perform important task at the time when context is initialized and destroyed.
Course/Topic 7 - JavaScript - all lectures
-
In this lecture session we learn about JavaScript is the Programming Language for the Web. JavaScript can update and change both HTML and CSS. JavaScript can calculate, manipulate and validate data and also talk about basic terms of javascript in brief.
-
In this JavaScript Interview Questions tutorial, you will get to know about the different questions being asked by the interviewers in an interview and their answers regarding JavaScript like What is JavaScript, the difference between JavaScript and JScript, how to add JavaScript onto a web page among many others which will help you in clearing any JavaScript interview and get a high paid job in an organization.
-
In this lecture session we learn about There are four basic types of output: audio output, graphics output, text output, and video output. Below are examples of each type of these outputs.
-
In this lecture session we do an example of lecture 2 and also talk about how we do this example in the best way.
-
In this lecture session we learn about A variable's type determines the values that the variable can have and the operations that can be performed on it. For example, the declaration int count declares that count is an integer ( int ).
-
In this lecture session we learn about Variable hoisting means the JavaScript engine moves the variable declarations to the top of the script.
-
In this lecture session we learn about Hoisting in JavaScript is a behavior in which a function or a variable can be used before declaration. For example, // using test before declaring console.log(test); // undefined var test; Run Code.
-
In this lecture session we learn about A string is any series of characters that are interpreted literally by a script. For example, "hello world" and "LKJH019283" are both examples of strings. In computer programming, a string is attached to a variable as shown in the example below.
-
In this lecture session we learn about Date Picker Combobox: An editable date input combobox that opens a dialog containing a calendar grid and buttons for navigating by month and year.
-
In this lecture session we learn about Comparison operators — operators that compare values and return true or false . The operators include: > , < , >= , <= , === , and !== . Logical operators — operators that combine multiple boolean expressions or values and provide a single boolean output.
-
In this lecture session we learn about In computer programming, comparison operators are used in conditional expressions to determine which block of code executes, thus controlling the program flow. Comparison operators compare two values in an expression that resolves to a value of true or false.
-
In this lecture session we learn about Arrays in C are of two types; Single dimensional arrays and Multidimensional arrays. Single Dimensional Arrays: Single dimensional array or 1-D array is the simplest form of arrays that can be found in C. This type of array consists of elements of similar types and these elements can be accessed through their indices.
-
In this lecture session we learn about Multi dimensional arrays: (a) Two dimensional (2-D) arrays or Matrix arrays: In it each element is represented by two subscripts. Thus a two dimensional m x n array A has m rows and n columns and contains m*n elements.
-
In this lecture session we learn about Event handlers that can be used to handle and verify user input, user actions, and browser actions: Things that should be done every time a page loads. Things that should be done when the page is closed. Action that should be performed when a user clicks a button.
-
In this lecture session we learn about In general, an event handler has the name of the event, preceded by "on." For example, the event handler for the Focus event is onFocus. Many objects also have methods that emulate events. For example, a button has a click method that emulates the button being clicked.
-
In this tutorial we learn about In shallow copy, only fields of primitive data type are copied while the objects references are not copied. Deep copy involves the copy of primitive data type as well as object references.
-
In this lecture session A shallow copy of an object is a copy whose properties share the same references (point to the same underlying values) as those of the source object from which the copy was made.
-
In this lecture session we learn about The attribute command supports these subcommands. You can copy attributes from an object to a specified object, a project to a specified project, and from a project to specified subprojects. You can also append attributes from an object to a specified object.
-
In this lecture session we learn about You can use the /attribute command to get the total value of an attribute, get the base value of an attribute, set the base value of an attribute, or work with attribute modifiers for a targeted entity in Minecraft.
-
In this lecture session we learn about Constructor operators like NEW and VALUE construct new values whose parts can be passed (except when the initial value is created), whereas constructor operators like CONV, CAST, REF, and EXACT convert a single passed value.
-
In this lecture session we learn about The Copy constructor and the assignment operators are used to initialize one object to another object. The main difference between them is that the copy constructor creates a separate memory block for the new object. But the assignment operator does not make new memory space.
-
In this lecture session we learn about JavaScript has function scope: Each function creates a new scope. Variables defined inside a function are not accessible (visible) from outside the function. Variables declared with var , let and const are quite similar when declared inside a function. They all have Function Scope: function myFunction() {
-
In this lecture session we learn about The Script scope is a useful place to store variables which must be shared without exposing the variable to the Global scope (and therefore to anyone with access to the session). For example, the following short script stores a version number in a script-level variable.
-
In this tutorial we learn about Function scoped variables: A function scoped variable means that the variable defined within a function will not be accessible from outside the function. Block scoped variables: A block scoped variable means that the variable defined within a block will not be accessible from outside the block.
-
In this lecture session we learn about Classes are a template for creating objects. They encapsulate data with code to work on that data. Classes in JS are built on prototypes but also have some syntax and semantics that are not shared with ES5 class-like semantics.
-
In this lecture session we learn about JavaScript is a multi-paradigm language, which means that we can easily mix a lot of different paradigms inside a simple piece of JavaScript code. We can use object-oriented, procedural and functional programming paradigms all at the same time in JavaScript.
-
In this lecture session we learn about The getter function is used to retrieve the variable value and the setter function is used to set the variable value. Remember: You can directly access public member variables, but private member variables are not accessible.
-
In this lecture session we learn about In javascript getters and setters, a “getter” or “setter method” is a method whose primary purpose is to write to or change a class field. A “getter” or “getter method,” on the other hand, is a method whose sole purpose is to return the current data of a class field.
-
In this lecture session we learn about Method Chaining is the practice of calling different methods in a single line instead of calling other methods with the same object reference separately. Under this procedure, we have to write the object reference once and then call the methods by separating them with a (dot.).
-
In this lecture session we learn about If you can serialize your object into its canonical string representation, and can unserialize it back into its object form from said string representation, then yes you can put it into a cookie.
-
In this lecture session we learn that Cookies are basically text, so you can store an array by encoding it as a JSON string (see json_encode ). Be aware that there is a limit on the length of the string you can store though.
-
In this lecture session we learn about AJAX stands for Asynchronous JavaScript And XML. In a nutshell, it is the use of the XMLHttpRequest object to communicate with servers. It can send and receive information in various formats, including JSON, XML, HTML, and text files.
-
In this lecture session we learn about AJAX stands for Asynchronous JavaScript and XML. AJAX is a new technique for creating better, faster, and more interactive web applications with the help of XML, HTML, CSS, and Javascript. Ajax uses XHTML for content, CSS for presentation, along with Document Object Model and JavaScript for dynamic content display.
-
In this tutorial we learn about When called, generator functions do not initially execute their code. Instead, they return a special type of iterator, called a Generator. When a value is consumed by calling the generator's next method, the Generator function executes until it encounters the yield keyword.
-
In this lecture session we learn about A Generator function that returns us an iterator, which can be used to stop the function in the middle, do something, and then resume it whenever. A normal function starts executing and returns when the function completes, but a Generator function can be stopped any number of times and resumed later.
-
In this lecture session we learn about Bootstrap Modals offer a lightweight, multi-purpose JavaScript popup that's customizable and responsive. They can be used to display alert popups, videos, and images in a website.
-
In this lecture session we learn about To find the mode, or modal value, it is best to put the numbers in order. Then count how many of each number. A number that appears most often is the mode.
-
- In this lecture session we learn about A programming structure that continually tests for external events and calls the appropriate routines to handle them. An event loop is often the main loop in a program that typically waits for the user to trigger something.
-
In this lecture session we learn about Event loop: An event loop is something that pulls stuff out of the queue and places it onto the function execution stack whenever the function stack becomes empty.
-
In this lecture session we learn about It is used for fetching files from remote machines and storing them locally in a file tree, organized by hostname. Files that already exist at the desk will be overwritten if they are different from the src. This module is also supported for Windows targets.
-
In this lecture session we learn about Arrow functions are a new way to write anonymous function expressions, and are similar to lambda functions in some other programming languages, such as Python. Arrow functions differ from traditional functions in a number of ways, including the way their scope is determined and how their syntax is expressed.
-
In this lecture session we learn about In software development, a pattern (or design pattern) is a written document that describes a general solution to a design problem that recurs repeatedly in many projects. Software designers adapt the pattern solution to their specific project.
-
In this lecture session we learn that Localization refers to the adaptation of a product, application or document content to meet the language, cultural and other requirements of a specific target market (a locale).
-
In this lecture session we learn about Character combinations consisting of a backslash (\) followed by a letter or by a combination of digits are called "escape sequences." To represent a newline character, single quotation mark, or certain other characters in a character constant, you must use escape sequences.
-
In this lecture session we learn that a tail call is a subroutine call performed as the final action of a procedure. If the target of a tail is the same subroutine, the subroutine is said to be tail recursive, which is a special case of direct recursion.
-
In this lecture session we learn about Outside people and hackers. The people who work for your company. The applications that your users use to perform their business tasks. The operating systems that run on your users' desktops and your servers, as well as the equipment employed.
-
In this JavaScript Interview Questions tutorial, you will get to know about the different questions being asked by the interviewers in an interview and their answers regarding JavaScript like What is JavaScript, the difference between JavaScript and JScript, how to add JavaScript onto a web page among many others which will help you in clearing any JavaScript interview and get a high paid job in an organization.
-
In this lecture session we learn about Logic problems that tend to boil down to “Think logically and try everything until something sticks.” The trick to solving them to break them down to their simplest parts. Don't try to keep track of it all in your head, and have a plan.
Course/Topic 8 - Angular 8 - all lectures
-
In this session we will learn about the introduction of Angular 8, what is angular and about the pre requisites which are required to learn Angular. Angular is a platform which is used to build dynamic web applications. We will also learn about the challenges faced in modern web framework, such as unified UX, Fluid UX, Progressive web apps and Single page applications.
-
In this session we will learn about the Angular CLI Introduction and Angular Directory Structure. Angular CLI helps us to add features to existing Angular applications. Furthermore, in the video we will learn how to install Angular CLI in your machine with practical examples. We will also learn in detail to run your new angular application and sending the data.
-
In this session we learn about Angular components and how it is the main building block of Angular application. The main purpose of component is to provide data to the view. We will also learn about important component metadata properties. Furthermore, we will see about different types of component selector.
-
In this session we will discuss about data binding and what is data binding in Angular. Data binding is a technique by which data stays in sync between component and view. We will also discuss about the uses of data binding, interpolation in Angular and property binding. Furthermore, we will see practical tutorial of how to run components, interpolation and property binding.
-
In this session, we will learn about the class binding in Angular, style binding and event binding. The class binding is used to add or remove classes to and from HTML elements. The video further talks about the three ways by which we can add or remove classes from HTML elements. Furthermore, the video explains how event binding allows us to bind events such as keystrokes, clicks, hover, touché etc. in a method to component.
-
In this session we will discuss what are piper is Angular. Pipes are used to display data to the end user and to change appearance of the data. Further we will see the syntax of the different types of pipes in Angular – lower case, upper case, title case, slice, json, percent, number, currency, date.
-
In this session we discuss about how to integrate bootstrap with Angular 8. Bootstrap is a CSS framework which helps to develop responsive web pages. We will also learn a number of ways to integrate bootstrap with Angular 8 which are as follows: 1. Including bootstrap CSS and JavaScript in the head section of the index.html file, 2. Importing the bootstrap CSS file in the global styles.css file of your Angular project. 3. Adding the bootstrap CSS and JavaScript files in the styles and script arrays of Angular json.
-
In this session we will discuss about Angular Directives and how many types of angular directives are available in Angular. The Angular directives help us to manipulate the Document Objective Model. We will also learn how to change appearance, behavior or layout of a DOM element using directives. We will also see the classification of Angular directives based on their behavior: 1. Component Directives 2. Structural Directives 3. Attribute Directives
-
In this session we will discuss in detail about the structural directives in Angular 8. This directive works in conjunction with ngSwitchCase and ngSwitchDefaultDirectives. It is similar to the switch statement of JavaScript.
-
In this video we will discuss what is Angular routing and how it is an important key feature for every frontend framework. We will also learn about the process of dividing the UI of an application using URL’s. Further we will also see what is single page application in Angular and server side rendering with Angular Universal, how to work with wild card routes and redirect routes. Lastly, we will one practical example on how to develop such a single page application.
-
In this session we will further discuss about Routing specifically on route parameters. We will also learn about the ParaMap Observable and Failed Routes. In this session we will see the last part with respect to the application development.
-
In this session we will learn about dependency injection before we go ahead to learn about the services in Angular. Dependencies are services or objects that a class needs to perform its objects or functions. Further, we will see how Angular distinguishes components from services to increase modularity and reusability. Lastly the video will explain about Angular Observable and how it produces multiple values.
-
In this session we will learn about template driven forms in Angular. We will learn how Angular uses forms to handle user inputs, though Reactive forms and Template driven forms. Template driven forms are easy to use and similar to Angular JS form and offer two-way data binding with ngModel.
-
This tutorial is a sequel to the previous video on template driven forms. In this session we will further see about Validation with visual feedback and displaying error messages. We will also learn about Select control validation and Form validation, in a step by step and practical approach.
-
This is the last video on template driven forms. In this tutorial we will learn about how to submit form data to the server and how to perform error handling. Further we will also discuss about Express JS and how it is a minimal and flexible NodeJs web application framework. Lastly we will see how to install express in our application using npm install express.
-
In this tutorial we will learn what are reactive forms and how to work with reactive forms in Angular. Reactive forms provide direct explicit access to the underlying forms objectives model. We will see the distinguishing of reactive forms and template driven forms and how reactive forms are more robust, scalable, reusable and testable. Lastly we will see how to develop a simple form and a form model.
-
This session is in continuation to part 1 of reactive forms. In this session we will highlight the validations. We will learn about 3 types of validations. 1. Simple Validation 2. Custom Validation 3. Cross field Validation We will learn the above by creating a simple registration form and working upon the same.
-
In this session we will learn how to apply conditional validation to the form control and how to work with dynamic form controls. Further we will also see how to submit form data. The video will be using a diagram and a registration form to demonstrate the validation.
-
In this session we will learn about the component interaction in Angular. Component interaction is when multiple components will interact with each other to share the data between them. Further we will see how our Angular component class will interact with the template and two-way binding script. We will also be covering Setters and Getters in Angular as well as ViewChild ().
-
In this session we will be discussing Angular Component Interaction with respect to the component itself. We will learn how components are interacting with each other. We will see the different available components such as parent component and multiple child components. Further we will learn how parent component interacts with child component are interacting with each other and how to send data from parent component to child component. Lastly we will see how to establish the relation between these components.
-
In this session we are going to discuss how the interaction is going to happen between parent and child component and how at the same time our parent component can get access to the properties and methods of child component. We will also see how to access properties and methods of child component in the parent class component itself and how to send back data from parent component to child component using Decorator.
-
In this session we will be seeing what is Angular CLI and how to install ANGULAR CLI in our machines. Further we will discuss how to generate the angular project using angular CLI and how to work with ng new commands along with options. We will also be seeing the limitation that we will come across and the issues developer will face if they don’t use Angular CLI in real-time projects.
-
In this session we will see how to generate a component using Angular CLI and how to generate service using Angular CLI. We will also discuss about class and interface with rest to type slip and how to work with ng serve along with options. Lastly we will see how to customize component and other things in Angular CLI.
-
In this tutorial we will discuss about component life cycle hooks in Angular. We will see the lifecycle of a component as follows: • Creates the component • Renders the component • Creates and renders the component children • Checks when the component data bound properties change • Destroys the component before removing it from the DOM We will also discuss about the 3 most commonly used hooks.
-
In this session we are going to see how to call an external API in Angular by taking the support of http client and the http client module. The tutor will also explain what is API and REST API. API is a set of rules that allows programs to talk to each other. In REST API, rest stands for representational state transfer. Further we will also learn about the HTTP Request Methods.
-
In this session we will discuss about how to call external API in Angular with put, patch and delete method. We will further learn how to retrieve data from the server and based on conditions. We will also learn how to update a resource and a particular piece of resource and delete a resource. • PUT: Put method creates a new resource or replaces a representation of the target resources. • PATCH: The patch method is used to apply partial modifications to a resource • DELETE: The delete method deletes the specified resource.
-
In this session of Angular we are going to discuss compiling angular application. Further we will see how to use ng command to execute Angular application. We will also see what is ng serve command and when to use ng serve command. The ng serve command helps in building and serving the applications from memory for faster development experience.
-
In this session we will discuss about the Angular Development Build and Production build. First we will see how to create an application with commands ng build and ng build production. We will also cover the major differences between ng build development and ng build production. The tutor will then explain source maps and how source maps are used.
-
In this session of Angular 8 we will see how to deploy angular 8 applications in Tomcat server. Tomcat is a java based web server and provides an environment to deploy and run web applications. It will also explain the purpose of a server by taking request from a client and processing that request.
-
In this tutorial we will discuss about unit testing in angular 8. Further we will see what is unit testing and why we need to use unit testing. Unit testing is nothing but the writing of the test code by the programmer. Further we will see what is Jasmine and some features of Jasmine. In this video, we will also discuss about karma. Lastly, we will write some of the test cases with some sample components in the Angular project.
Course/Topic 9 - Node.js - all lectures
-
This tutorial is designed for software programmers who want to learn the basics of Node.js and its architectural concepts. This tutorial will give you enough understanding on all the necessary components of Node.js with suitable examples.
-
This video on 'Node.js Installation' will help you in installing Node.js in your system.
-
We will talk about the node.js variable scopes, how ECMAScript has defined the variables, and variable hoisting.
-
In this session, we'll discuss var, let and const with respect to their scope, use, and hoisting.
-
In this session, you’ll learn all about JavaScript’s arrow function syntax — including some of the gotchas you need to be aware of when leveraging arrow functions in your code.
-
In this video we’ll learn how to do the same. And also, how to pass arrays to such functions as parameters.
-
In this video, Template literals are string literals allowing embedded expressions. You can use multi-line strings and string interpolation features with them.
-
There is a special object in JavaScript called module. Exports. When some program includes or import this module (program), this object will be exposed. Therefore, all those functions that need to be exposed or need to be available so that it can used in some other file, defined in module. Exports.
-
In this tutorial, we will learn how to construct for loops in JavaScript, consisting of the for, for...of and for...in statements. Loops are an integral part of programming in JavaScript, and are used for automating repetitive tasks and making code more concise and efficient.
-
The destructuring assignment syntax is a JavaScript expression that makes it possible to unpack values from arrays, or properties from objects, into distinct variables.The object and array literal expressions provide an easy way to create ad hoc packages of data.
-
Node.js global objects are global in nature and they are available in all modules. We do not need to include these objects in our application, rather we can use them directly. These objects are modules, functions, strings and object itself as explained in this video.
-
In this section, we will introduce the Node.js module system and its most common usage patterns. Modules are the bricks for structuring non-trivial applications, but also the main mechanism to enforce information hiding by keeping private all the functions and variables that are not explicitly marked to be exported.
-
In this tutorial, we are going to do is we want to serve some JSON data using HTTP Module and File System Module. I want to show you when we create a server and how we can actually pull information from an API.
-
Node.js has a built-in module called HTTP, which allows Node.js to transfer data over the Hyper Text Transfer Protocol (HTTP).
-
In this tutorial, you will learn about the Node.js events module and how it works.
-
The Node.js Zlib module which is used to provide compression and decompression (zip and unzip) functionalities. It is implemented using Gzip and deflate/inflate.
-
The Path module provides a way of working with directories and file paths.
-
Lecture 17 - npm - package.json - installing and uninstalling packages
-
Node implements File I/O using simple wrappers around standard POSIX functions. The Node File System (fs) module can be imported using in the tutorial.
-
The Node.js Query String provides methods to deal with query string. It can be used to convert query string into JSON object and vice-versa.
-
To use query string module, you need to use require('querystring'). The Query String module provides a way of parsing the URL query string.
-
This video briefly introduces databases, and how to use them with Node/Express apps. It then goes on to show how we can use Mongoose to provide database access for the Local Library website.
-
This tutorial provides a basic understanding of the commonly used operations on Streams. Streams are objects that let you read data from a source or write data to a destination in continuous fashion.
-
In Express.js, file upload is slightly difficult because of its asynchronous nature and networking approach.
-
This Nodejs tutorial help to send email using nodemailer. You can send mail as a plain text, HTML body and email with attachment.I will demonstrate all flavors of email using node Nodemailer.
-
In this session, we’ll give an overview of the criteria to consider when choosing a database, a recommended NoSQL option, and a brief tutorial.
-
To create a database in MongoDB, start by creating a MongoClient object, then specify a connection URL with the correct ip address and the name of the database you want to create.
-
Node.js can be used in database applications. One of the most popular NoSQL databases is MongoDB.
-
In this tutorial, you will learn about the Mostly all modern-day web applications have some sort of data storage system at the backend.
-
In this tutorial, we will see how we can use databases from within Node js applications.
-
Learn how to access document-based database MongoDB using Node.js in this section.
-
MongoDB is a document database with the scalability and flexibility that you want. It is a very popular database used with many web applications. This uplatz video on 'Node.js MongoDB Tutorial' will help you in connecting your web application with a MongoDB database.
-
This Uplatz video on Node.js with MongoDB Database Tutorial will help you in connecting your web application with a MongoDB database.
-
This video will help you in learning how to connect to a MongoDB database from your Node.js application. In this tutorial, many topics have been covered.
-
In this session, we will tell you how you can connect to MongoDB Atlas, a cloud-based DB service, from your local Node.js / Express.js environment.
-
In this tutorial, you will learn how to connect to the MySQL database server from a node.js application.
-
There are some options to interact with MySQL from a node.js application. In this tutorial, we will show you how to use node.js driver for MySQL called mysqljs/mysql.
-
In this tutorial, you have learned how to connect to a MySQL database from a node.js application.
-
This Tutorial will help you learn how to connect your webserver to a MySQL database.
-
This tutorial will help you understand what is MySql and how to connect Node.js with MySQL along with a nads-on demo. Since it is a very popular combination while working in the web development area, this quick intro is hugely beneficial for people entering into MERN stack, a very popular technology stack used for developing web applications.
-
In this tutorial, you will learn how to establish Mysql database connection using Nodejs. This step-by-step guide will help you to install mysql module and sample code, helps you to connect with mysql database.
-
In this video you will get to know the basic knowledge of HTML, Javascript and how client-servers work.
-
Express is a minimal and flexible Node.js web application framework that provides a robust set of features for web and mobile applications. It is an open-source framework developed and maintained by the Node.js foundation.
-
Express provides a minimal interface to build our applications. It provides us the tools that are required to build our app. It is flexible as there are numerous modules available on npm, which can be directly plugged into Express.
-
After completing this tutorial, you will be able to build moderately complex websites and back-ends for you mobile applications.
Course/Topic 10 - ReactJS course - all lectures
-
In this lecture session we learn about basic introduction of React js and also talk about why we use react js and React js is good for beginners.
-
Creating Reusable Component- In this session we learn about how we installation React js in your system and also talk about Node.js webpack and how we create React APP.
-
Props; State; Hello World Component; Creating Components; Nesting Components; Component states - Dynamic user-interface; Variations of Stateless Functional Components; setState pitfalls
-
In this tutorial we learn about higher order components and how we import components and also talk about features and functions of state components in Reactjs.
-
ReactJS component written in TypeScript; Installation and Setup; Stateless React Components in TypeScript; Stateless and property-less Components; Life-cycle methods; Installation of Yarn
-
In this tutorial we learn about React js component written in typescript life cycle They serve the same purpose as JavaScript functions, but work in isolation and return HTML. Components come in two types, Class components and Function components, in this tutorial we will concentrate on Function components.
-
In this lecture session we learn about The state is a built-in React object that is used to contain data or information about the component. A component's state can change over time; whenever it changes, the component re-renders.
-
In this tutorial we learn about The state object is where you store property values that belong to the component. When the state object changes, the component re-renders and also talks about features and factors of the JSX state of things.
-
In this lecture session we learn about React ES6 ES6 brings new syntax and new awesome features to make your code more modern and more readable. It allows you to write less code and do more and also talk about features of React ES6 in brief.
-
In this lecture session we learn about React class components are rarely used in modern React development but we still need to know them in case we need to work on old legacy projects. If you want to embrace modern React, then you should use function components with hooks.
-
In this tutorial we learn about Webpack is a tool that lets you compile JavaScript modules, also known as module bundler. Given a large number of files, it generates a single file (or a few files) that run your app. It can perform many operations: helps you bundle your resources. watches for changes and re-runs the tasks.
-
Pure Components- In this lecture session we learn about Parent components passing props down to its children. Children components can not pass props up to their parent component. The Passing of callback functions as a prop allows children components to make changes in their parent component.
-
In this lecture session we learn about Controlled components in React are those in which form data is handled by the component's state. Forms are used to store information in a document section. The information from this form is typically sent to a server to perform an action and also talk about basic difference between Controlled vs. Uncontrolled user interaction.
-
In this lecture session we learn about Style Libraries. These are tools that assist with applying styles to elements. There are a variety of ways that this can happen. The most common type of style library is a React js processor. These take as input a language similar to React js but with more features, and output standard React js that the browser can understand.
-
Fetching Remote Data - Data-Driven- In this lecture session we learn about The most accessible way to fetch data with React is using the Fetch API. The Fetch API is a tool that's built into most modern browsers on the window object ( window. fetch ) and enables us to make HTTP requests very easily using JavaScript promises.
-
In this tutorial we learn about React is an open-source front-end JavaScript library maintained by a community of a group of developers and Meta. React is primarily used for building application UI. It is mainly used for developing single-page applications and mobile applications.
-
In this tutorial we learn about A "selector function" is any function that accepts the Redux store state (or part of the state) as an argument, and returns data that is based on that state. Selectors don't have to be written using a special library, and it doesn't matter whether you write them as arrow functions or the function keyword.
-
In this lecture session we learn about An attribute is a property of an element used to provide access to additional data required for that specific element to process the output.
-
In this lecture session we learn about DOM manipulation interacting with the DOM API to change/modify the HTML document that is to be rendered on the web browser. This HTML document can be changed/modified to add elements, remove elements, edit elements, move elements around, etc.
-
In this lecture session we learn about The Document Object Model (DOM) is a standard convention for accessing and manipulating elements within HTML and XML documents. Elements in the DOM are organized into a tree-like data structure that can be traversed to navigate, locate, or modify elements and/or content within an XML/HTML document.
-
In this lecture session we learn about If you are creating a Deferred, keep a reference to the Deferred so that it can be resolved or rejected at some point. Return only the Promise object via deferred. promise() so other code can register callbacks or inspect the current state.
-
In this lecture session we learn about A JavaScript method must be coded to initiate the asynchronous Ajax based file upload; A component must exist on the server to handle the file upload and save the resource locally; The server must send a response to the browser indicating the JavaScript file upload was successful.
-
In this lecture session we learn about The React AutoComplete supports the autofill behavior with the help of autofill property. Whenever you change the input value and press the down key, the AutoComplete will autocomplete your data by matching the typed character.
-
In this lecture session we learn about React is a popular framework used to make dynamic web apps. It splits HTML into component files using a format called JSX, and uses JavaScript to dynamically render pages. It's very useful, but there's one problem—the loading times are a lot longer than basic pages with no JavaScript. React works by loading a bundle.
-
In this tutorial we learn about APIs are used for fetching data from the server and using AJAX and API we call data asynchronously and show it in our HTML. You can make API requests by using browser built- in fetch functions or third party libraries like Axios.
-
In this lecture session we learn about Redux Middleware allowing you to intercept every action sent to the reducer so you can make changes to the action or cancel the action. Middleware helps you with logging, error reporting, making asynchronous requests, and a whole lot more.
-
In this lecture session we learn about Redux official documentation. It carries a payload of information from your application to store. As discussed earlier, actions are plain JavaScript objects that must have a type attribute to indicate the type of action performed.
-
In this lecture session we learn about Environment variables that are embedded into the build, meaning anyone can view them by inspecting your app's files. The environment variables are embedded during the build time. Since Create React App produces a static HTML/CSS/JS bundle, it can't possibly read them at runtime.
-
In this tutorial, you will learn about the different questions frequently being asked by any interviewer to the candidates about ReactJS like the difference between Real DOM and Virtual DOM, What is React, what are the limitations of React among many others. With the help of this tutorial, you will be able to clear any interview on ReactJS, giving the most appropriate answers to the questions being asked and will succeed in getting a high paid job in an organization.
Course/Topic 11 - C and Embedded C Programming - all lectures
-
Lecture 1 - Embedded C - Introduction and Basic Data Types
-
Lecture 2 - C Programming - part 1
-
Lecture 3 - C Programming - part 2
-
Lecture 4 - C Programming - part 3
-
Lecture 5 - C Programming - part 4
-
Lecture 6 - C Programming - part 5
-
Lecture 7 - C Programming - part 6
-
Lecture 8 - Embedded C - Practice 1
-
Lecture 9 - Embedded C - Practice 2
-
Lecture 10 - Embedded C - Preprocessing
-
Lecture 11 - C Traps and Pitfalls - part 1
-
Lecture 12 - C Traps and Pitfalls - part 2
-
Lecture 13 - Secrets of printf in C
-
Lecture 14 - Standard C Library
Course/Topic 12 - C++ Programming - all lectures
-
Lesson 1 - Introduction to C++ Programming
-
Lesson 2 - Debugging Tools - Objects - Types - Values
-
Lesson 3 - Operators - Expressions - Control Flow - Functions
-
Lesson 4 - Input - Output - Classes
-
Lesson 5 - Temporary Objects - Functors - Templates
-
Lesson 6 - Lambda Expressions - Classes - Inheritance
-
Lesson 7 - Virtual Functions and Run-time Polymorphism
-
Lesson 8 - Containers - Iterators - Algorithms - Templates
-
Lesson 9 - Time Measurements - Exceptions - References
-
Lesson 10 - Smart Pointers and References
-
Lesson 11 - Moving - Forwarding - Concurrency
-
Lesson 12 - Multithreads and Mutexes
-
Lesson 13 - Condition Variables and Atomics
-
Lesson 14 - Atomic Memory Models and Undefined Behavior
-
Lesson 15 - Best Practices - Tips - Pitfalls in C++
Course/Topic 13 - SQL Programming with MySQL Database - all lectures
-
In this video get an in-depth introduction to the terminology, concepts, and skills you need to understand database objects, administration, security, and management tools. Plus, explore T-SQL scripts, database queries, and data types
-
In this video learn basic of SQL Programming and overview the SQL basic commands and how we use these commands in SQL Programming. This SQL tutorial will teach you basics on how to use SQL in MySQL, SQL Server, MS Access, Oracle, Sybase, Informix, Postgres, and other database systems.
-
In this video we talk about DDL (DATA DEFINATION LANGUAGE) and also cover all the basic techniques of DDL.In this video we will learn about the SQL commands – DDL, DML, DCL; SQL Constraints – Keys, Not Null, Check , Default, and also MYSQL Hands-on and basic Querying
-
In this video session we learn SQL commands and how to use these commands like select command, insert command, delete command etc. In this video we will learn about hands-on experience on the terminal, creating database, Tables and manipulating data.
-
In this video we learn about SQL Basic and Aggregate Functions and also cover different functions of SQL. This tutorial teaches us about clauses and the update command. We will also cover making records, updating and modifying rows.
-
In this session we talk about SQL Regular Expression and we also cover all techniques of SQL Regular Expression.This tutorial teaches us about clauses and the update command. We will also cover making records, updating and modifying rows and EML commands.
-
In this video we learn about SQL Comparison Clauses and how we use Comparison Clauses in SQL. This tutorial covers Comparison Operators by relating values by a mathematical symbol which is used to compare two values. Learn about comparison operators result - TRUE, FALSE, or UNKNOWN
-
In this session we learn about SQL String and also cover all types of string in SQL and how we can use SQL Strings. In this video we will learn about the basic string functions such as concat_ws, file format, and insert function, L-case, u case, and lower case. We will also learn about basic functions such as upper functions.
-
In this session we cover advance level string function and also cover all different commands we use in SQL String Function. This video is a sequel for string functions tutorial. In this tutorial we will learn few most useful string functions such as spaces and null issue as well, L-Pad command.
-
In this SQL String function part 3 we learn select Repeat function and Select Replace function and also cover different between Select Repeat function and Select Replace function. This tutorial is another sequel to string functions, however, these functions are used less and not used that frequently. We will further learn here about the repeat function, absolute function, ceiling, and floor and down functions.
-
In this session we learn about SQL Numeric Functions and how we use Numeric functions in SQL. In this video, we will be covering numerical functions. Learn about the basic date functions and also about truncate functions.
-
In this video session we learn about SQL Numeric Function and also cover the basic functionality of SQL Numeric Function. SQL Data Functions. In this video we will learn about few more Date functions. We will further look into the day function option as well. This tutorial covers basic querying over a single table.
-
: In this video we talk about SQL Joins Introduction and Demonstration and basic join’s function and how to make table using joins. In this tutorial learn about joints in SQL. This tutorial teaches us how to connect two different tables with joints. We will also cover the topic of querying two or more tables and about subquery .
-
In this lecture last session we talk about MySQL Workbench and procedures and Views and MySQL Workbench functionality. In this tutorial learn about SQL in automating things. This tutorial covers stroll procedure, functions and views which are helpful for automation purposes in SQL.
Course/Topic 14 - Introduction to DevOps - all lectures
-
In this session of you will get an intro about the DevOps.
Course/Topic 15 - Git and GitHub - all lectures
-
Need of version control system. This series related to Git and GitHub, what is Git and what is Git hub and how we need to work with GitHub as a real-time tool. VCS – Version Control system –provides the process of monitoring team members work and activities in the project.
-
What is Git .Git as a VCS for tracking changes in source-code. Different Git Software we need to download in the system as per the operating system.
-
How to install Git Software in windows operating system . Later, how we can register in GitHub
-
Workflow with respect to Git. Basic Git operations and workflow (explained with diagram). Git in action.
-
What is remote repository and how to create remote repository.
-
How to add existing project to GitHub using Git Bash. Using spring tool list
-
Basic feature on working with local repositories and remote repository. Local repository, remote repository - performing operations such as how to fetch the code from remote repository to local repository
-
In this session how to push an existing project to remote repository. Perform all the activities to through IDE tool i.e. HTS IDE tool important IDE tool for JAVA Developers.
-
How to push project and project related files into GitHub remote repository from local repository through VS code IDE tool. VS code is an open source tool used by mostly frontend developers.
-
How to perform delete operations? How to delete files present in local repository? Create or initialize empty local repository
-
Discus about branches in Git. What is a branch as a version of your repository? Multiple copies of actual project. main copy – Master branch.
Course/Topic 16 - Software Performance Engineering and Multicore Programming - all lectures
-
Lecture 1 - Software Performance Engineering
-
Lecture 2 - Introduction to Multicore Programming
-
Lecture 3 - Multithreaded Parallelism and Performance Measures
-
Lecture 4 - Analysis of Multithreaded Algorithms
-
Lecture 5 - Issues in Parallelization
-
Lecture 6 - Synchronizing without Locks and Concurrent Data Structures
-
Lecture 7 - Cache Complexity
-
Lecture 8 - Around Montgomery Trick
-
Lecture 9 - Space vs Time and Cache vs Memory
-
Lecture 10 - Experience in Coding High Performance Numerical Libraries
-
Lecture 11 - FFT based Polynomial Arithmetic on Multicore
-
Lecture 12 - Parallel Programming for Many Core Architectures
-
Lecture 13 - Memory Hierarchy Optimization - part 1
-
Lecture 14 - Memory Hierarchy Optimization - part 2
-
Lecture 15 - Writing Correct Programs
-
Lecture 16 - Floating Point and Linear Algebra
-
Lecture 17 - Applications
-
Lecture 18 - Dynamic Scheduling and Sorting
-
Lecture 19 - Virtual Machines
-
Lecture 20 - Hypervisor Architecture
-
Lecture 21 - Multicore Computing
-
Lecture 22 - Multicore Programming - part 1
-
Lecture 23 - Multicore Programming - part 2
-
Lecture 24 - Multicore Programming - part 3
-
Lecture 25 - Multicore Programming - part 4
-
Lecture 26 - Multicore Programming - part 5
Course/Topic 17 - Performance Testing with LoadRunner - all lectures
-
Session 1 - Performance Testing with LoadRunner
-
Session 2 - Performance Testing with LoadRunner
-
Session 3 - Performance Testing with LoadRunner
-
Session 4 - Performance Testing with LoadRunner
-
Session 5 - Performance Testing with LoadRunner
-
Session 6 - Performance Testing with LoadRunner
-
Session 7 - Performance Testing with LoadRunner
-
Session 8 - Performance Testing with LoadRunner
-
Session 9 - Performance Testing with LoadRunner
-
Session 10 - Performance Testing with LoadRunner
-
Session 11 - Performance Testing with LoadRunner
-
Session 12 - Performance Testing with LoadRunner
-
Session 13 - Performance Testing with LoadRunner
-
Session 14 - Performance Testing with LoadRunner
-
Session 15 - Performance Testing with LoadRunner
-
Session 16 - Performance Testing with LoadRunner
-
Session 17 - Performance Testing with LoadRunner
-
Session 18 - Performance Testing with LoadRunner
-
Session 19 - Performance Testing with LoadRunner
-
Session 20 - Performance Testing with LoadRunner
-
Session 21 - Performance Testing with LoadRunner
-
Session 22 - Performance Testing with LoadRunner
-
Session 23 - Performance Testing with LoadRunner
-
Session 24 - Performance Testing with LoadRunner
-
Session 25 - Performance Testing with LoadRunner
-
Session 26 - Performance Testing with LoadRunner
-
Session 27 - Performance Testing with LoadRunner
-
Session 28 - Performance Testing with LoadRunner
-
Session 29 - Performance Testing with LoadRunner
-
Session 30 - Performance Testing with LoadRunner
-
Session 31 - Performance Testing with LoadRunner
-
Session 32 - Performance Testing with LoadRunner
-
Session 33 - Performance Testing with LoadRunner
-
Session 34 - Performance Testing with LoadRunner
-
Session 35 - Performance Testing with LoadRunner
-
Session 36 - Performance Testing with LoadRunner
Course/Topic 18 - Leadership and Management - all lectures
-
In this lecture session we learn about honesty and integrity in leadership and management and also talk about some basic terms of leadership and management.
-
In this lecture session we learn about how confidence is a must in leadership and management and also talk about the importance of confidence in leadership and management.
-
In this tutorial we learn about A soft skill is a personal attribute that supports situational awareness and enhances an individual's ability to get a job done. The term soft skills is often used as a synonym for people skills or emotional intelligence.
-
In this lecture session we learn about Soft skills, also called people skills, are the mix of social and interpersonal skills, character traits, and professional attitudes that all jobs require. Teamwork, patience, time management, communication, are just a few examples.
-
In this lecture session we learn that Communication in teams is more than just efficient work. It allows everyone on the team to be educated on any topic that may affect their work. Moreover, it develops trust, builds camaraderie among the team members, boosts morale, and helps employees stay engaged in the workplace.
-
In this lecture session we learn about Effective communication can help to foster a good working relationship between you and your staff, which can in turn improve morale and efficiency.
-
In this lecture session we learn about what commitment Concentration – leadership commitment involves making a personal decision to support the change no matter what. It is incongruous to ask for change in others while failing to exhibit the same level of commitment. Concentration requires maintaining focus throughout the change not just at the beginning.
-
In this lecture session we learn about Market leadership is the position of a company with the largest market share or highest profitability margin in a given market for goods and services. Market share may be measured by either the volume of goods sold or the value of those goods.
-
In this lecture session we learn that Motivational leadership is defined by positivity and vision. Motivational leaders make decisions, set clear goals and provide their teams with the empowerment and tools to achieve success. Motivational leaders evoke and see the best in their employees, inspiring them to work toward a common goal.
-
In this lecture session we learn about A primary task of leadership is to direct attention. To do so, leaders must learn to focus their own attention. When we speak about being focused, we commonly mean thinking about one thing while filtering out distractions.
-
In this tutorial we learn about Marketing analytics helps collect and strengthen data from across all marketing channels. This information is key to improving marketing efforts and driving them forward to achieve business goals.
-
In this lecture session we learn about Marketing automation is the integration of data and processes from other sales and marketing channels into an organized central platform. A comprehensive marketing automation hub complements and organizes the customer journey. It integrates all of a business's channels and outreach within the customer database.
-
In this tutorial we learn about Growth hacking (also known as 'growth marketing') is the use of resource-light and cost-effective digital marketing tactics to help grow and retain an active user base, sell products and gain exposure.
-
In this tutorial we learn about Growth Hacking is a new field focusing solely on growth, based on a data-driven, experiment-based process. A growth hacker explores new growth opportunities systematically in any part of the customer journey, from awareness through marketing to brand ambassadors by optimizing the product.
-
In this lecture session we learn about Product marketing is the process of bringing a product to market. This includes deciding the product's positioning and messaging, launching the product, and ensuring salespeople and customers understand it. Product marketing aims to drive the demand and usage of the product.
-
In this lecture session we learn about the marketing, sales, product, and customer success teams are no longer siloed. They are interwoven in a cohesive experience with the product at the center, and the customer at the center of the product.
-
In this tutorial we learn about how Product marketers know the message and story to convey, who to convey it to, and at what time it needs conveying- but marketing is responsible for turning that knowledge into blog posts, ad copy, and press releases.
-
In this lecture session we learn about PR involves communicating with your market to raise awareness of your business, build and manage your business's reputation and cultivate relationships with consumers. While marketing focuses on promoting actual products and services, public relations focuses on promoting awareness, attitudes and behavior change.
-
In this lecture session we learn about building relationships with the public in order to create a positive public image for a company or organization. It also has different disciplines, such as corporate communications, internal communications, marketing communications, crisis communications.
-
In this lecture session we learn about Public relations helps build an online presence across multiple platforms – social media, earned media, paid media and more. Public relations is important because it involves storytelling. Advertising and marketing can only go so far, and can become bothersome at times, turning consumers away from the product.
-
In this lecture session we learn about Both advertising and PR help build brands and communicate with target audiences. The most basic difference between them is that advertising space is paid while public relations results are earned through providing the media with information in the form of press releases and pitches
The "Career Path: Engineering Lead" course is designed to prepare participants for leadership roles in engineering and technology teams. This comprehensive course covers fundamental and advanced concepts in project management, programming languages (Python, R, Java, JavaScript, C, C++), web development frameworks (JSP, Servlets, Angular, Node.js, React), database management (SQL, MySQL), DevOps practices, software performance engineering, and leadership skills. Upon completion of this course, participants will possess a diverse skill set in engineering technologies, programming languages, and project management. By the end of the course, participants will be able to Master Project Management Fundamentals and Software Performance Engineering and Multicore Programming.
-Key Course Objectives-
1) Project Management Fundamentals:-
2) Principles of project management
3) Project planning, scheduling, and budgeting
4) Risk management and mitigation strategies
5) Python Programming:-
6) Basics of Python programming language
7) Advanced Python programming techniques
8) Python libraries for data analysis and scripting
9) R Programming:-
10) Introduction to R programming language
11) Data manipulation and statistical analysis with R
12) Building predictive models using R
13) Java Programming:-
14) Fundamentals of Java programming
15) Object-oriented programming (OOP) concepts in Java
16) Java application development
17) JavaServer Pages (JSP):-
18) Creating dynamic web pages with JSP
19) JSP lifecycle and tags
20) Integrating Java code with JSP
21) Java Servlets:-
22) Introduction to Java Servlets
23) Servlet lifecycle and handling HTTP requests
24) Servlets in web application development
25) JavaScript Programming:-
26) Basics of JavaScript programming
27) DOM manipulation and event handling
28) Asynchronous JavaScript and AJAX
29) Angular 8:-
30) Introduction to Angular framework
31) Components, services, and data binding in Angular
32) Routing and navigation in Angular applications
33) Node.js:-
34) Server-side JavaScript with Node.js
35) Building RESTful APIs with Express.js
36) Handling asynchronous operations with Node.js
37) React:-
38) Building user interfaces with React
39) State management with Redux
40) Hooks and functional components in React
41) C and Embedded C Programming:-
42) Basics of C programming language
43) Embedded systems programming with C
44) Memory management and pointers in C
45) C++ Programming:-
46) Object-oriented programming with C++
47) Standard Template Library (STL) in C++
48) Advanced topics in C++ programming
49) SQL Programming and MySQL:-
50) Basics of SQL (Structured Query Language)
51) MySQL database management and querying
52) Indexing, transactions, and stored procedures in MySQL
53) Introduction to DevOps:-
54) DevOps principles and practices
55) Continuous Integration and Continuous Deployment (CI/CD)
56) Tools and automation in DevOps workflows
57) Git and GitHub:-
58) Version control with Git
59) Collaborative software development with GitHub
60) Branching, merging, and pull requests in Git
61) Software Performance Engineering and Multicore Programming:-
62) Principles of software performance engineering
63) Multithreading and concurrency in multicore programming
64) Performance optimization techniques
65) Performance Testing with LoadRunner:-
66) Introduction to performance testing
67) Load testing scenarios with LoadRunner
68) Analyzing performance test results
69) Leadership and Management:-
70) Leadership styles and qualities
71) Team building and motivation
72) Conflict resolution and decision-making strategies
This syllabus covers a wide range of topics essential for an Engineering Lead, encompassing technical skills in programming languages, web development frameworks, database management, DevOps practices, and leadership qualities necessary for managing and leading engineering teams effectively.
Career Path: Engineering Lead Syllabus
Module 1: Introduction to Engineering Leadership In this foundational module, participants will explore the essential qualities and responsibilities of an Engineering Lead. The module will cover the importance of leadership in engineering teams, including fostering innovation, managing team dynamics, and driving project success. Participants will learn about different leadership styles and how to adapt their approach based on team needs and organizational culture, setting the stage for effective leadership practices.
Module 2: Project Management Principles This module focuses on key project management concepts critical for Engineering Leads. Participants will learn about project lifecycle stages, agile methodologies, and tools for effective project planning and execution. Topics will include scope definition, resource allocation, risk management, and performance monitoring. Hands-on exercises will allow participants to apply these principles in real-world scenarios, enhancing their ability to lead engineering projects from conception to completion.
Module 3: Technical Expertise and Architecture Design In this module, participants will deepen their technical knowledge, focusing on system architecture and design principles. Key topics will include design patterns, scalability, and integration of complex systems. Participants will learn how to guide their teams in making informed technical decisions and balancing trade-offs between performance, maintainability, and cost. This module emphasizes the Engineering Lead’s role in shaping the technical direction of projects.
Module 4: Team Building and Performance Management Effective team management is crucial for successful engineering leadership. In this module, participants will explore strategies for building high-performing teams, including recruitment, onboarding, and fostering a collaborative culture. Topics will include performance evaluation, feedback mechanisms, and professional development. Participants will learn how to motivate their teams, resolve conflicts, and create an environment that encourages creativity and innovation.
Module 5: Communication and Stakeholder Engagement This module emphasizes the importance of communication skills for Engineering Leads. Participants will learn techniques for effective communication within their teams and with stakeholders, including executives, clients, and cross-functional teams. Topics will include presenting technical information clearly, active listening, and managing expectations. The module will prepare participants to serve as effective liaisons between technical and non-technical stakeholders.
Module 6: Strategic Thinking and Decision Making In this module, participants will develop strategic thinking skills essential for leading engineering teams. Participants will learn how to analyze market trends, identify opportunities for innovation, and make data-driven decisions that align with organizational goals. Key topics will include SWOT analysis, cost-benefit analysis, and risk assessment. This module equips Engineering Leads with the tools to guide their teams in making strategic choices that drive success.
Module 7: Continuous Improvement and Quality Assurance This module focuses on the principles of continuous improvement and quality assurance in engineering processes. Participants will learn about methodologies such as Lean, Six Sigma, and Agile, and how to implement these practices within their teams. Topics will include process mapping, root cause analysis, and metrics for measuring quality. Participants will gain insights into fostering a culture of continuous improvement and ensuring high-quality outcomes in engineering projects.
Module 8: Career Development and Industry Trends The final module emphasizes career development strategies for aspiring Engineering Leads. Participants will explore industry trends, emerging technologies, and the evolving role of engineering leadership in organizations. Topics will include networking strategies, professional branding, and certifications relevant to engineering management. This module aims to empower participants to navigate their career paths effectively and identify opportunities for growth and advancement.
Conclusion
By the end of this course, participants will possess a comprehensive understanding of the skills and knowledge necessary to succeed as Engineering Leads. They will be equipped to manage engineering teams effectively, drive project success, and foster a culture of innovation and continuous improvement. With practical experience and strategic insights, participants will be well-prepared to advance their careers in engineering leadership and make a significant impact within their organizations.
An Engineering Lead is a senior role responsible for overseeing engineering teams, managing projects, and ensuring the successful delivery of engineering solutions. This position requires a blend of technical expertise, leadership skills, and strategic vision. Here are some of the top certifications for an Engineering Lead, along with their benefits:
Top Certifications for Engineering Leads
1.Project Management Professional (PMP)
Overview: Offered by the Project Management Institute (PMI), PMP certification is one of the most recognized project management credentials globally.
Benefits:
1).Leadership Skills: Demonstrates your ability to lead and manage engineering projects effectively.
2).Project Management Expertise: Validates your skills in project planning, execution, monitoring, and completion.
3).Industry Recognition: Enhances your credibility and career prospects in managing complex engineering projects.
2.Certified ScrumMaster (CSM)
Overview: Offered by Scrum Alliance, CSM certification focuses on Agile project management and Scrum methodologies.
Benefits:
1).Agile Proficiency: Validates your ability to lead engineering teams using Agile and Scrum practices.
2).Team Leadership: Enhances your skills in facilitating Scrum processes and improving team collaboration.
3).Market Demand: Agile and Scrum skills are highly valued in technology and engineering sectors.
3.Certified Engineering Manager (CEM)
Overview: Offered by the American Society for Engineering Management (ASEM), the CEM certification focuses on engineering management principles.
Benefits:
1).Management Skills: Validates your ability to manage engineering teams, projects, and resources effectively.
2).Strategic Insight: Provides skills in strategic planning, decision-making, and organizational leadership.
3).Professional Recognition: Enhances your standing as a leader in the engineering field.
4.Lean Six Sigma Black Belt
Overview: Offered by various organizations, including ASQ and IASSC, Lean Six Sigma Black Belt certification focuses on process improvement and quality management.
Benefits:
1).Process Improvement: Validates your expertise in using Lean Six Sigma methodologies to improve engineering processes.
2).Leadership in Quality: Demonstrates your ability to lead projects aimed at reducing waste and improving quality.
3).Career Advancement: Enhances your qualifications for leadership roles in engineering and operations.
5.AWS Certified Solutions Architect – Professional
Overview: Offered by Amazon Web Services (AWS), this certification focuses on designing and deploying scalable systems on AWS.
Benefits:
1).Cloud Architecture Expertise: Validates your ability to design and manage complex cloud solutions, a key skill for modern engineering leads.
2).Advanced Skills: Demonstrates advanced knowledge in cloud architecture and AWS services.
3).Industry Relevance: AWS is a leading cloud platform, making this certification valuable for technology and engineering roles.
6.Certified Information Systems Security Professional (CISSP)
Overview: Offered by (ISC)², CISSP certification focuses on information security and management.
Benefits:
1).Security Expertise: Validates your ability to manage and oversee security policies and practices within engineering projects.
2).Risk Management: Demonstrates skills in identifying and mitigating security risks.
3).Industry Recognition: Enhances your qualifications for leadership roles involving information security.
7.Certified DevOps Engineer (CDE)
Overview: Offered by various organizations, this certification focuses on DevOps practices and tools for continuous integration and delivery.
Benefits:
1).DevOps Proficiency: Validates your ability to implement and manage DevOps practices, improving engineering efficiency and collaboration.
2).Automation Skills: Demonstrates expertise in using automation tools and practices to streamline development and operations.
3).Market Demand: DevOps skills are in high demand for engineering and IT roles, enhancing your career prospects.
8.Professional Engineer (PE)
Overview: Offered by the National Council of Examiners for Engineering and Surveying (NCEES) in the U.S., PE certification is a recognized credential for licensed professional engineers.
Benefits:
1).Professional Licensing: Validates your engineering expertise and adherence to industry standards and ethics.
2).Career Advancement: Enhances your qualifications for leadership roles in engineering and consulting.
3).Industry Credibility: Provides a recognized credential that enhances your professional credibility and career opportunities.
9.Certified Cloud Security Professional (CCSP)
Overview: Offered by (ISC)², CCSP certification focuses on cloud security and data protection.
Benefits:
1).Cloud Security Expertise: Validates your ability to manage and secure cloud-based engineering solutions.
2).Risk Management: Demonstrates skills in assessing and mitigating cloud security risks.
3).Career Opportunities: Enhances your qualifications for roles involving cloud security and compliance.
By obtaining these certifications, you can demonstrate your ability to lead and manage engineering teams, oversee complex projects, and apply advanced technical skills, positioning yourself for a successful career as an Engineering Lead.
Career and Jobs- After completing the Career Path - Engineering Lead course, which covers a comprehensive range of topics including programming languages, project management, software engineering, and leadership skills, individuals are prepared for senior-level roles in engineering management and software development. Here are typical job roles and potential salary ranges associated with this career path:
1).Engineering Lead / Technical Lead-Salaries for engineering leads or technical leads can vary widely based on experience and industry. On average, engineering leads can earn between $100,000 to $160,000 per year.
2).Software Development Manager-Salaries for software development managers typically range from $110,000 to $180,000 per year.
3).Technical Architect- Salaries for technical architects can range from $120,000 to $200,000 per year.
4).DevOps Engineer-Salaries for DevOps engineers typically range from $100,000 to $160,000 per year.
5).Performance Engineer-Salaries for performance engineers can range from $90,000 to $150,000 per year.
6).Project Manager (Engineering Projects)-Salaries for project managers specializing in engineering projects can range from $100,000 to $160,000 per year.
7).Software Development Team Lead- Salaries for software development team leads typically range from $90,000 to $150,000 per year.
These salary ranges are approximate and can vary based on factors such as geographic location, industry sector (technology, finance, healthcare), specific skills and certifications, years of relevant experience, and the size of the organization. Continuous learning, advanced certifications (such as PMP for project management), and proficiency in emerging technologies can further enhance career prospects and earning potential in engineering leadership and software development roles.
Q1:How do you ensure that a project stays on track and meets its deadlines?
A: To ensure a project stays on track, I employ a combination of strategic planning, monitoring, and communication. I start by defining clear project objectives, scope, and milestones. I use project management tools to create detailed schedules and assign tasks. Regular progress reviews and status meetings help track progress and address any issues promptly. Risk management strategies are implemented to handle potential setbacks. Effective communication with stakeholders ensures alignment and timely resolution of any obstacles.
Q2:How do you utilize Python in your engineering projects, and what are some common libraries you use?
A: Python is utilized for a variety of tasks in engineering projects, including data analysis, automation, and scripting. Common libraries I use include:
1).NumPy and Pandas: For data manipulation and analysis.
2).Matplotlib and Seaborn: For data visualization.
3).SciPy: For scientific computing and advanced mathematical functions.
4).Requests: For handling HTTP requests. Python’s simplicity and extensive library support make it ideal for rapid development and solving complex problems efficiently.
Q3:What are the core principles of Java programming that you adhere to, and how do they benefit your projects?
A: Core principles of Java programming that I adhere to include:
1).Object-Oriented Programming (OOP): Utilizing encapsulation, inheritance, and polymorphism to create modular and maintainable code.
2).Write Once, Run Anywhere (WORA): Ensuring code portability across different platforms by adhering to Java’s platform-independent nature.
3).Exception Handling: Using try-catch blocks to manage runtime errors gracefully. These principles help in building robust, reusable, and cross-platform applications, enhancing project quality and maintainability.
Q3:How do you use JavaServer Pages (JSP) in web development, and what are its advantages?
Ans:JSP is used for creating dynamic web pages by embedding Java code within HTML. Its advantages include:
1).Separation of Concerns: JSP allows for a clear separation between presentation and business logic, improving maintainability.
2).Reusability: JSP tags and custom tags can be reused across different pages, reducing redundancy.
3).Integration: It integrates seamlessly with Java servlets and other Java EE technologies, facilitating the development of scalable web applications. JSP simplifies the development of dynamic web content and enhances the organization of web application code.
Q4:How do you utilize JavaScript in modern web development, and what are some best practices you follow?
Ans:JavaScript is used to create interactive and dynamic web applications. In modern web development, I use JavaScript for:
1).DOM Manipulation: To dynamically update the content and structure of web pages.
2).Event Handling: To respond to user interactions like clicks and form submissions.
3).AJAX Requests: To fetch data asynchronously and update web pages without reloading. Best practices include:
4).Using ES6 Features: Such as arrow functions, template literals, and destructuring for cleaner code.
5).Modularizing Code: By organizing JavaScript into modules for better maintainability.
6).Ensuring Cross-Browser Compatibility: Testing code across different browsers to ensure consistent behavior.
Q5:How do you leverage Angular 8 for building web applications, and what are its key features?
Ans: Angular 8 is used for building single-page applications with a focus on performance and modularity. Key features include:
1).Angular CLI: For scaffolding and managing Angular projects efficiently.
2).Component-Based Architecture: For creating reusable UI components.
3).Reactive Programming: With RxJS for handling asynchronous data streams.
4).Angular Services: For managing data and business logic. I leverage Angular 8’s features to build scalable, maintainable applications with a rich user interface and strong data-binding capabilities.
Q6:How do you use Node.js in your projects, and what are its benefits?
A: Node.js is used for building scalable server-side applications and handling I/O operations efficiently. Benefits of using Node.js include:
1).Non-Blocking I/O: Allows for handling multiple requests concurrently without waiting for previous operations to complete.
2).Event-Driven Architecture: Facilitates real-time data processing and communication.
3).NPM Ecosystem: Provides access to a vast number of libraries and modules for various functionalities. I use Node.js to build RESTful APIs, handle backend services, and manage real-time applications effectively.
Q7:What are the key features of React, and how do you use it to build user interfaces?
A: Key features of React include:
1).Component-Based Architecture: Enables the creation of reusable and isolated UI components.
2).Virtual DOM: Optimizes rendering performance by updating only the parts of the DOM that have changed.
3).React Hooks: Provides a way to use state and lifecycle features in functional components. I use React to build interactive user interfaces by creating modular components, managing state efficiently, and utilizing React’s ecosystem to enhance application performance and maintainability.
Q8:How do you apply C and Embedded C programming in your projects, and what are the main considerations?
Ans: C and Embedded C are used for systems programming and developing applications for embedded systems. Main considerations include:
1).Memory Management: Efficient use of memory is crucial in embedded systems with limited resources.
2).Real-Time Constraints: Ensuring that the code meets real-time requirements and responds to inputs promptly.
3).Hardware Interaction: Writing code that interfaces directly with hardware components. I apply C and Embedded C to develop low-level applications, device drivers, and real-time systems, ensuring optimal performance and reliability.
Q9: What are some advanced features of C++ that you use, and how do they enhance your projects? A: Advanced features of C++ include:
1).Object-Oriented Programming (OOP): Using classes, inheritance, and polymorphism to create modular and reusable code.
2).Templates: For writing generic and type-safe code that works with different data types.
3).STL (Standard Template Library): Provides efficient data structures and algorithms for common tasks.
4).Exception Handling: Using try-catch blocks to handle errors gracefully. These features enhance code maintainability, performance, and flexibility, allowing for the development of complex and efficient software solutions.
Q10:How do you use SQL programming in MySQL, and what are some best practices you follow?
Ans:I use SQL programming in MySQL to perform data manipulation and retrieval tasks. Best practices include:
1).Writing Efficient Queries: Using indexing and query optimization techniques to improve performance.
2).Data Normalization: Organizing data to reduce redundancy and improve consistency.
3).Security Measures: Implementing proper user access controls and SQL injection prevention techniques.
4).Backup and Recovery: Regularly backing up data and having a recovery plan in place. These practices ensure reliable, secure, and efficient database management.