


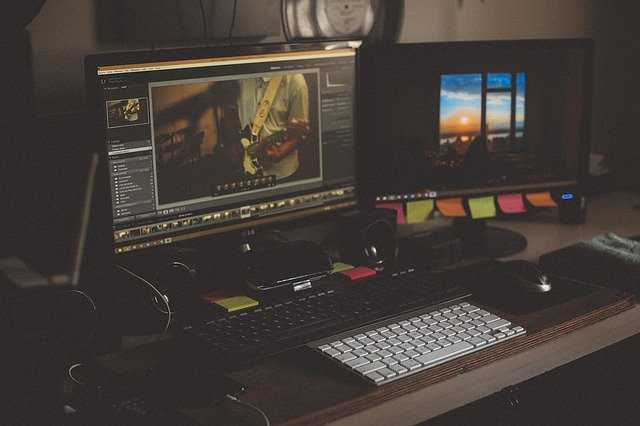
Adobe Photoshop - New User
Adobe Photoshop - New User
Adobe Photoshop is part of the Creative Suite collection.
Photoshop allows designers and photographers to produce variety of artwork by manipulating and composing digital and drawn images, using powerful layering and masking techniques and a wealth of special effect filters. During this Photoshop training course you will learn how to produce professional quality images for print and web. You will cover fundamental topics such as size, resolution, contrast and colour adjustments, retouching, special effects and correct output.
---------------------------------------------------------------
Suitability - Who should attend?
This course is suitable for anyone who needs to manipulate and edit digital images for print and web use, such as photographers, graphic designers.
Prerequisites
Delegates should have a good level of PC and windows skills, but do not need prior experience with Adobe Photoshop.
---------------------------------------------------------------
Adobe Photoshop - New User
Photoshop Overview
- About Photoshop
- Working with bitmap and vector images
- Various design workflow's
The Interface
- Using the menu bar
- Setting preferences
- Customising palettes
- Opening and importing images/graphics
- Creating new documents
- Navigation and magnification
- Using the Navigator window
Basic Image Manipulation
- Cropping
- Resizing the image
- Working with image resolution
- Setting colour modes
- Making greyscale images
- Saving formats
Image Enhancement
- Basic Levels
- Basic Curves
- Using Hue and Saturation
- Sepia effects
- Sharpening images
Correcting Mistakes
- Undo shortcuts
- Using the History palette
- Making a snapshot
Working with Selections
- Using the range of selection tools
- Working with selection options
- Saving selections to channels
- Editing selections
- Feathering images with selections
Changing Image Content
- Cloning in an image
- Using the retouching tools
- Working with the paint tools
- Using colour options in Photoshop
- Copying parts of other images
Working with Layers
- About Photoshop layers
- Creating/deleting layers
- Automatic layer creation
- Adding text layers
- Hiding/locking layers
- Setting layer attributes
- Working with layer sets
- Transforming layers
- Blending layers
- Using layer masks
- Creating Adjustment layers
- Working with layer effects
- Using the Flatten Image command
Considerations for Web and Print
- PSD documents for future editing
- Print based file formats
- Image compression for web
---------------------------------------------------------------
Adobe Photoshop Interview Questions & Answers
---------------------------------------------------------------------------------------------------
1) What is Adobe Photoshop?
Adobe Photoshop is software developed by Adobe to create and edit images and logos. By adobe photoshop adjustment and modification can be done.
2) How you can re-size the image in Photoshop?
To resize the image in Photoshop you have to go into menu bar, under menu bar you will find an option “Image Size”. On clicking that option, it will open a dialog box, by which you can adjust the size of the image.
3) What is a Gradient in Adobe Photoshop?
Gradients are a great way to introduce eye-catching and flashy graphics in your pages.
4) What are the Photoshop’s work areas?
The Photoshop’s work area includes Application Bar, Option Bar, Panel Dock and Tools panel.
5) List some important tools in Adobe Photoshop?
Some of the important tools in Adobe Photoshop are:
- Rectangular Marquee Tool (M)
- Red Eye Tool (J)
- Gradient Tool (G)
- Eraser Tool (E)
- Clone Stamp Tool (S)
- Brush Tool (B)
- Healing Brush Tool (J)
- Slice Tool (K)
- Crop Tool (C)
- Magic Wand Tool (W)
- Polygon Lasso Tool (L)
- Move Tool (V)
6) What is Rectangular Marquee Tool (M)?
Photoshop's basic selection tools that are designed for making selections based on simple geometric shapes. As the name implies, the Rectangular Marquee Tool is perfect for times when you need to draw a selection in the shape of a rectangle or a square.
7) What is Red Eye Tool (J)?
Red-eye is the condition that occurs when a camera’s flash reflects off the back of a person’s eye. With the help pf Red Eye tool, redness in eyes will be removed. With the Red Eye tool active, click in the red area of one eye. If the correction doesn't match the size of the pupils or seems too light or too dark, undo the effect and change the Pupil Size or the Darken Amount setting on the Options bar and then reapply. When you're satisfied with the result, click in the red area of the other eye.
8) What is Gradient Tool (G)?
The Gradient tool creates a blend of multiple colors. You can choose from preset gradient fills or create your own by blending our foreground and background color.
9) What is Eraser Tool (E)?
This tool works like an eraser and erases information wherever we click and drag it. It will change the pixels to either the background color or to transparent. If you are using the Eraser tool on a background or on a layer with transparency locked, the pixels change to the background color; otherwise, the pixels are erased to transparency.
10) What is Clone Stamp Tool (S)?
The Clone Stamp tool paints one part of an image over another part of the same image or over another part of any open document that has the same color mode. You can also paint some part of one layer over another layer. The Clone Stamp tool is useful for duplicating objects or removing a defect in an image.
11) What is Brush Tool (B)?
The Brush tool is a simple painting tool. It works like a traditional drawing tool by applying the color using strokes. It's located in the standard Tool Bar.
12) What is Healing Brush Tool (J)?
The Healing Brush tool is very beneficial. You can use the Healing Brush tool for repairs, such as eradicating scratches from scanned images. The variance between the Spot Healing Brush Tool and the Healing Brush tool is that a sample spot is required before applying the Healing Brush. We choose our cursor size, then holding the Alt key, we select a nice/clean area of our image. The source selected will be applied to the area which needs to be repaired. It works in the form of the Brush tool.
13) What is Slice Tool (K)?
The Slice tool lets you divide an image into smaller segments which fit together like a jigsaw, but with straight edges. There are two tools: The slice tool will create the slices whereas the Slice Select tool enables you to select and modify existing slices.
Sliced images are usually used for web design work, which sometimes involves images to be split up in this way.
14) What is Crop Tool (C)?
The Crop Tool works similarly to the Rectangular Marquee tool. The difference is when we press the Enter/Return key, it crops our image to the size of the box.
15) What is Magic Wand Tool (W)?
The Magic Wand Tool in Photoshop selects pixels based on tone and color.
16) What is Polygon Lasso Tool (L)?
The Polygonal Lasso Tool lets us draw as many sides as we need, with as much freedom as the Lasso Tool gives us to move in any direction we need!
17) What is Move Tool (V)?
The Move Tool in Photoshop can perform many functions such as moving layer contents, directly moving layers from one document to another, copying layers, applying transforms, plus selecting and aligning multiple layers.
18) How can you select the exact color to match?
An eye-dropper tool can be used to select the exact color to match. Select the foreground color square and cover it using the paint bucket tool or brush tool. The clone stamp tool can also be used. Use the Alt+ key and select where you want the color to be filled and cover up the area holding down the mouse button.
The layer is known as the smart object in Photoshop. It contains the image data from raster or vector images like Photoshop or Illustrator file.
Using the Lasso tools, a precise area of an image can be selected. There are three Lasso tools:
- Simple Lasso Tool
- Polygonal Lasso Tool
- Magnetic Lasso Tool
21) Explain what a clipping mask is?
Clipping mask is created in Photoshop when the content of one layer is used to mask the layers above it. So, it is basically like clipping around the artwork to fit the figure of the object on the layer.
They are the set of colors that are used without remembering the numeric codes of the colors. Colors can also be extracted from an available image. The users have additional options of using default swatches and custom swatches.
Histogram represents the distribution of tones of the whole image. It shows the details of the image like shadows, mid-tones, and highlights. This helps you in determining whether an image has enough details for a good correction or not.
The process of cropping an image involves the following steps:
- Select any random part of the image.
- From the menu, select the shape of the cropping tool.
- Hold the shift key and drag to select the marquee to circle or square.
- Hold marquee from the center, after selecting and cropping the image, hold down Alt.
25) What are the Photoshop’s work areas?
The Photoshop’s work area includes Application Bar, Option Bar, Panel Dock and Tools panel.
26) In Adobe Photoshop how you can print the grid?
First of all you have to place the non-printing grid in a manner you want the print, and then take a screen shot. Now, you have to open a new file and paste your screen shot image on it. Once done, you can crop the background of the Photoshop window except the image with the grid. The image is ready for print.
27) How do you organize layers in Photoshop?
A layer shows a picture or image. To organize layers in Photoshop, place various images in separate layers. Lock the unused layers and unlock the layers which are in use. When two or more layers need to be changed, unlock the layers.
28) How you can unlock the background in Photoshop?
To unlock the background image, first click on the picture or image and then select MODE option. After that, select the option GRAY SCALE and revert to LAYER. When you double click on the surface, the surface will be unlocked.
29) What is the difference between PSB (Photoshop Big) and PSD (Photoshop Document)?
PSB and PSD both are file formats to store digital images. There is very less difference between PSB and PSD, what they differ is how they are stored and used. PSD is a default extension for Photoshop files and it can support the file size of 30,000 by 30,000 pixels. While for creating big documents or large image .psb file format is used, and it can save an image size upto 300,000 by 300,000 pixels.
30) Can you use bamboo tablet in Photoshop?
Yes, you can use bamboo tablet in Photoshop. After installing the bamboo tablet software, open the software. Once done, the next step is to configure the four hotkeys of Bamboo tablet with the help of the software available in tablet. Create a new document and open the Photoshop, you can now have Photoshop with a bamboo tablet.
31) How can you reduce noise in an image?
Reduce noise option is helpful to reduce the color and luminance effect in the image. To reduce the noise in an image, you have to go in a menu bar, select a filter menu, and in that you will see an option for NOISE. Again, clicking on it, it will show other option including reducing noise.
32) How to create an artistic border?
To create an artistic border, you must select an image. After that, add a layer mask in a layer pallet then select filter-> brush strokes-> sprayed strokes.
33) Explain step by step that how can you form a transparent background in an image?
· Firstly change the background image as a layered image.
· After this, create the selection with the help of the Magic Wand tool.
· Then, select the background with the help of inversing your selection.
· Now, you will get the product with a transparent background.
· Lastly, save this image in the PNG-24 format.
34) Which tool is used to combine images?
To combine the images, the Auto-blend command can be used. It uses layer masks as per the requirement to mask-out over underexposed areas.
35) How will you fix blown out colors in Lightroom?
Go to the local adjustment brush option available in the Lightroom and adjust the color.
The effect of the color can either be reduced or balanced by increasing the proportion of the opposite color.
36) With the help of spin software how you can make 3D sphere?
To make 3D sphere, select blur from filter menu and click on radial blur. Select spin option in the blur method section, you can increase or decrease the amount of spin by dragging the slider.
37) How you fix the blurry images in Photoshop?
To fix the blurry images in Photoshop you can use sharpening tools. Sharpening the image will lose the pixels, make sure you are finished with everything else and saved the changes before you start sharpening the image.
38) Explain what is PostScript and showpage command?
PostScript is a page description language developed by Adobe Systems. It is a language for printing documents on laser printer, but it can also be used to produce images on other types of devices.
39) Explain how you can create the HDR effects in lightroom?
In order to give an HDR effect to photo in light room,
· You have to open the develop module of Lightroom
· First step is to choose tone base
· The tone base will hightlight various settings like shadows, whites and blacks, constrast, clarity, saturation etc. It will set the foundation for the faux HDR effect
40) What color is considered to be blown out?
Any color whose number exceeds 240 in light room is considered as blown out color.